blower1
Velociraptor

Posts: 49 
|
Post by blower1 on Jan 26, 2014 20:47:38 GMT
My long time project bike decide to broke it´s crankshaft main bearing in the last summer. I have one spare crank, which has same problem. I send it to reparation and while I´m waiting it back I´m going to made some modifications to the engine & other parts. First was top end oiler. I don´t like the billet ones. They look too bulky. I made it from hydraulic pipe parts: 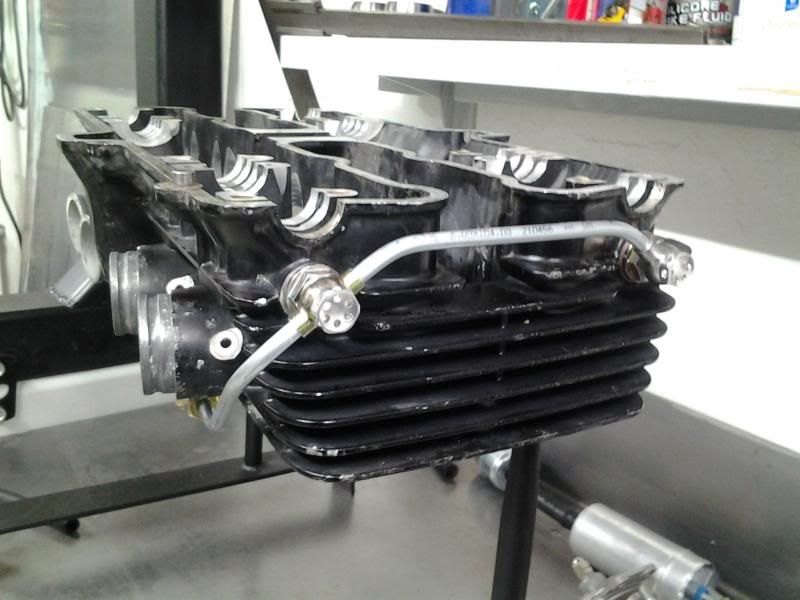 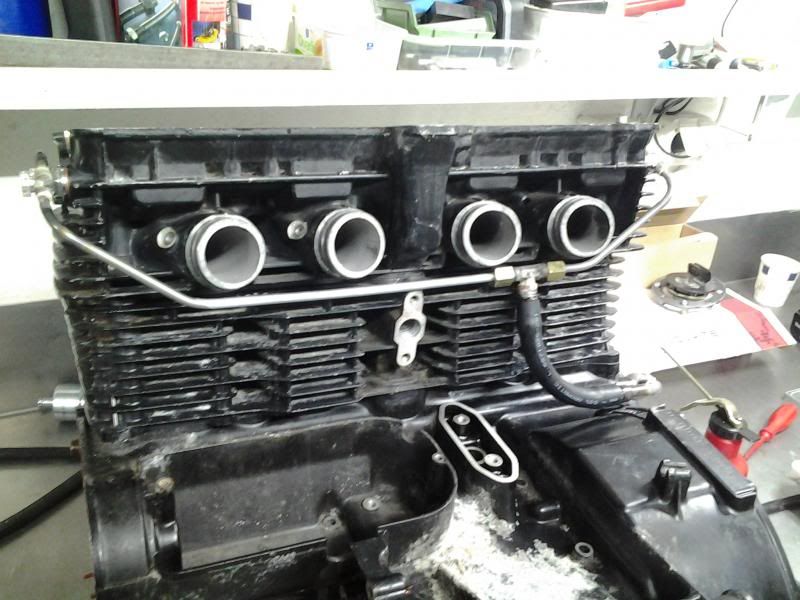 Next was to change the moto-x handlebar to clipons: 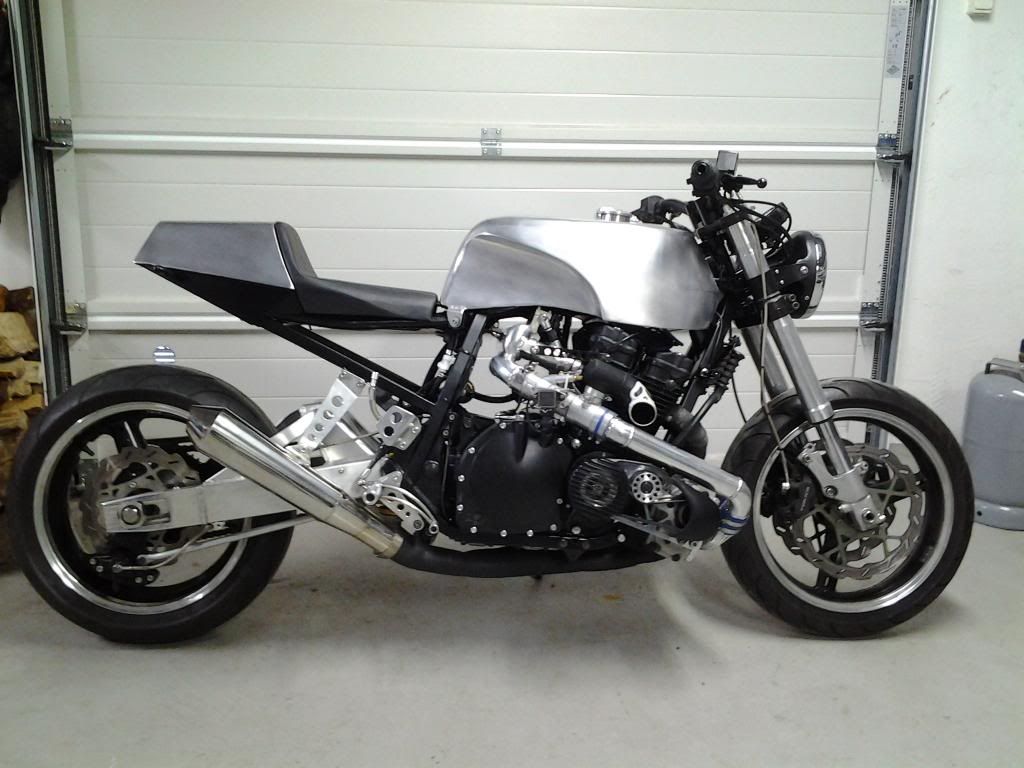 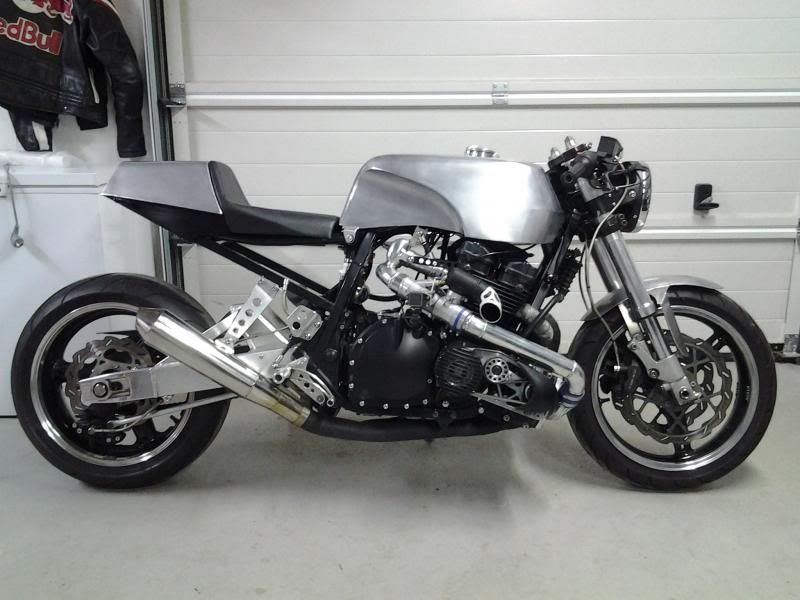 I started with the new fuel tank today. I try to get it "flow" better with the seat unit. First the tank tunnel with front fastener:  It was easier this time because I was able to copy the old tank tunnel and fasteners with some small modifications. 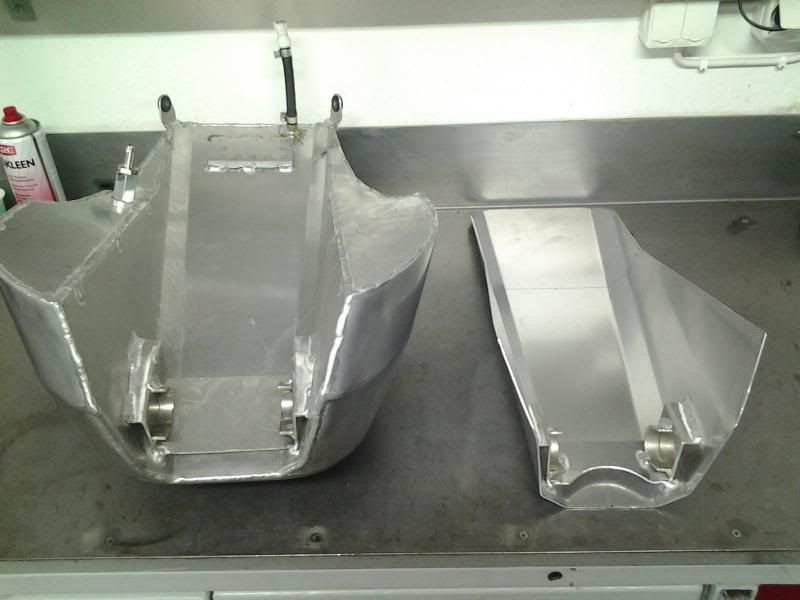 |
|
eightball_hotrod
Velociraptor
Posts: 30
Bikes: 1157 katana ,750 katana 2x, gsx 750 l,bandit 1200s
|
Post by eightball_hotrod on Jan 26, 2014 22:14:34 GMT
love the bike !!! go on with the great work !  |
|
wcgearhead
Velociraptor
Posts: 28
Bikes: 97' GSXR1100 with 750 top end
|
Post by wcgearhead on Jan 27, 2014 16:06:35 GMT
Bare metal look is awesome, I hope you would clear coat them and keep that way!
Are you going to do something on bottom support of subframe? I don't know about you but it kinda bothers me for it being empty. We would love to see sideshot of the bike with updated tank!
|
|
|
|
Post by pedda on Jan 27, 2014 16:08:39 GMT
Now that's what I call a nice stance!
|
|
blower1
Velociraptor
Posts: 49
|
Post by blower1 on Jan 27, 2014 17:55:54 GMT
Bare metal look is awesome, I hope you would clear coat them and keep that way! Are you going to do something on bottom support of subframe? I don't know about you but it kinda bothers me for it being empty. We would love to see sideshot of the bike with updated tank! Thanks for your comments! No clear coats for the tank & seat part. It´s are made from 5754 aluminum which is "sea grade" aluminum. Parts are only waxed. I like to keep that area under the seat empty. It looks more simply that way. |
|
|
|
Post by Kristjan on Jan 27, 2014 18:16:56 GMT
|
|
blower1
Velociraptor
Posts: 49
|
Post by blower1 on Jan 28, 2014 20:28:26 GMT
Slight progress today. Get the top part some kind of form. It needs a lot of hammering, bending and cutting before I can made next panels: 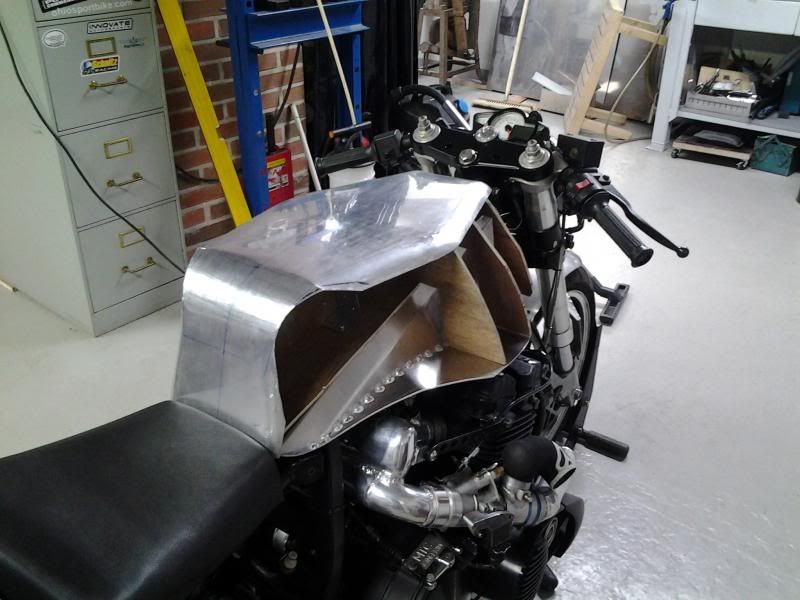 |
|
|
|
Post by fula28 on Jan 28, 2014 20:36:47 GMT
Great job, loving the rework on the tank , how much boost is she/was it running still love the whole stance of the bike great looking mean bike! Keep it up chief!
|
|
blower1
Velociraptor
Posts: 49
|
Post by blower1 on Jan 28, 2014 21:10:27 GMT
Great job, loving the rework on the tank , how much boost is she/was it running still love the whole stance of the bike great looking mean bike! Keep it up chief! Thanks! Boost is about 0,5 bar with 1360 cc big block. |
|
blower1
Velociraptor
Posts: 49
|
Post by blower1 on Jan 29, 2014 15:56:10 GMT
Spending several hours today making front side panels and truing, bending & hammering top panel. Front side panels: 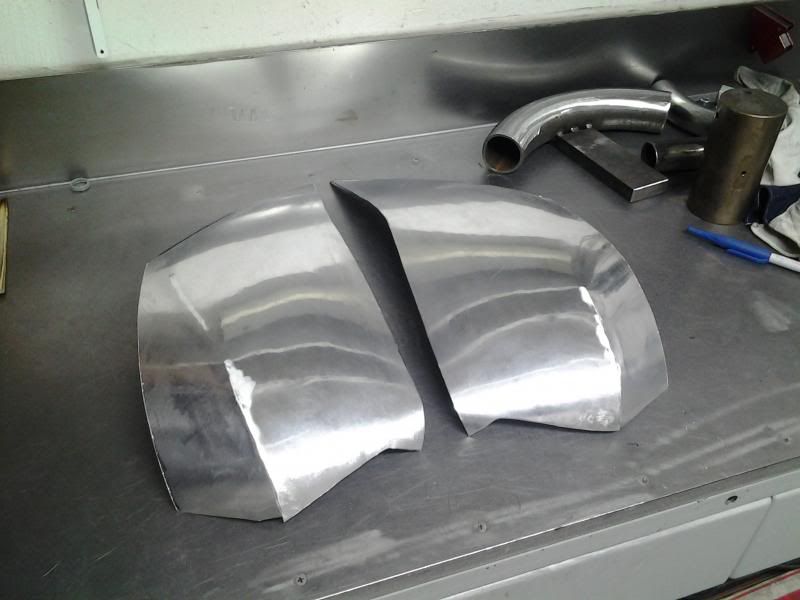 Top panel: 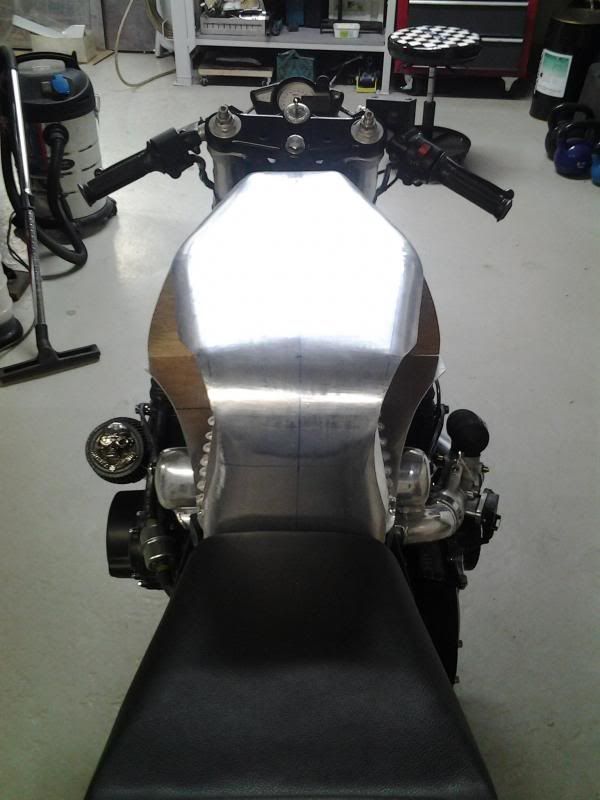 |
|
|
|
|
|
Post by captain chaos on Jan 29, 2014 19:47:08 GMT
nice work. But what was wrong with the old fuel tank?
|
|
blower1
Velociraptor
Posts: 49
|
Post by blower1 on Jan 29, 2014 20:23:47 GMT
nice work. But what was wrong with the old fuel tank? Nothing wrong with the old one, but I like to get a bit more room between tank and my arms when turning clipons/steering to max. |
|
blower1
Velociraptor
Posts: 49
|
Post by blower1 on Jan 30, 2014 10:42:47 GMT
Knee panels made, fitted and tack welded. Next thing to do is separate the tank from bottom part, hammer tuning all tack welds & seams, welding, grinding welds down, hammer tuning all welds and panels, etc. 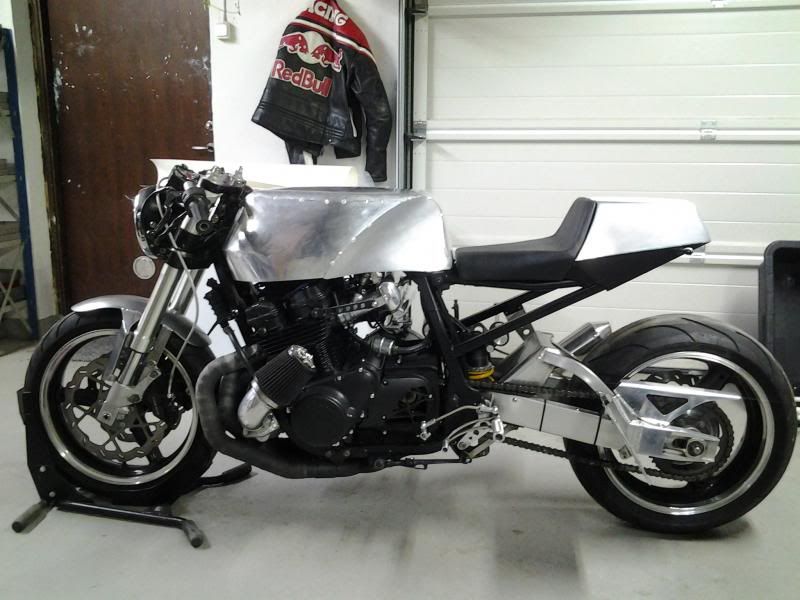 |
|
blower1
Velociraptor
Posts: 49
|
Post by blower1 on Jan 30, 2014 20:21:36 GMT
It take about one hour to weld the tank: 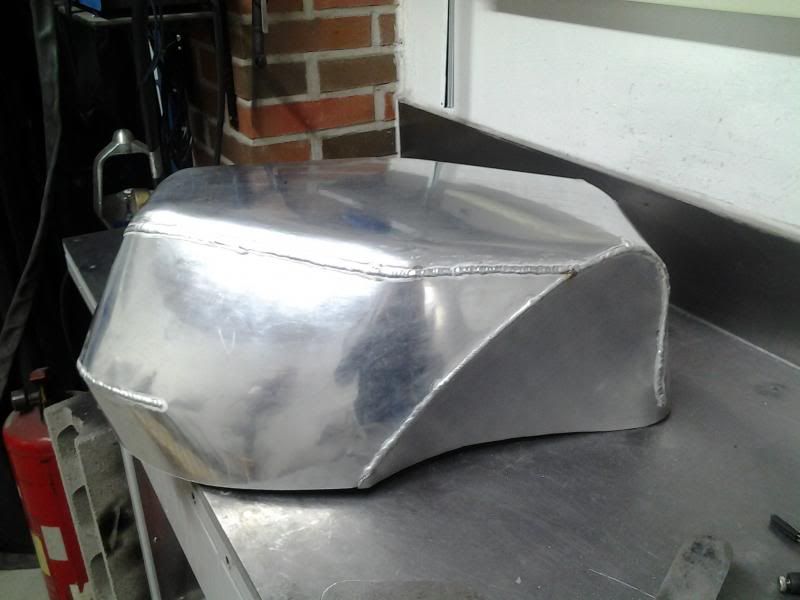 Some welds on inside: 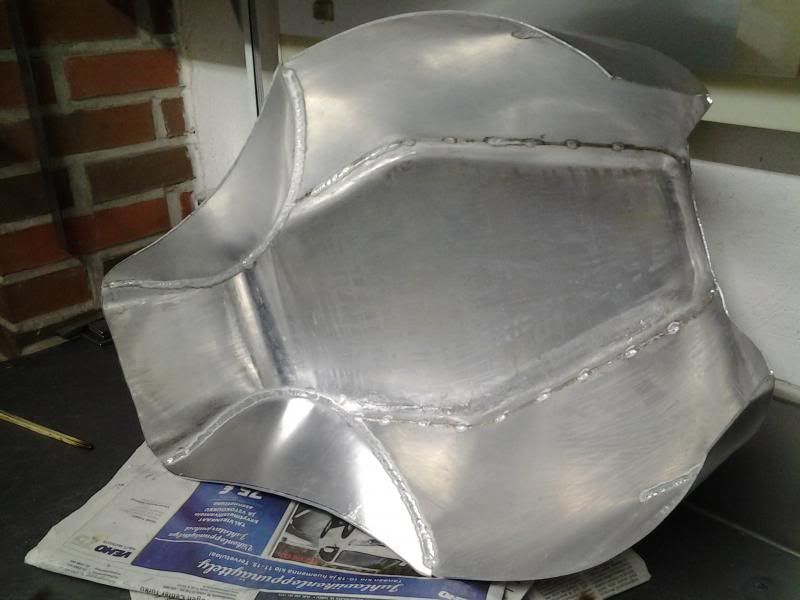 And after several hours of sanding & hammering it looked like this: 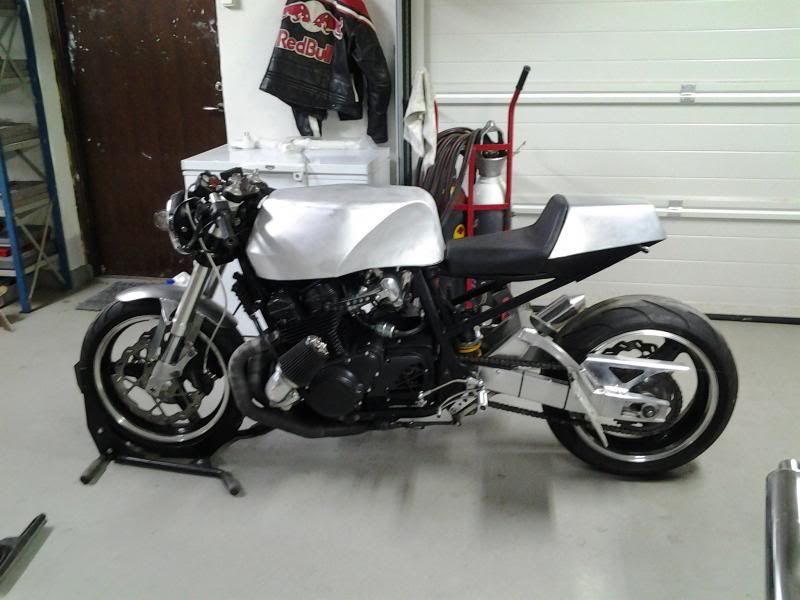 There are some high & low spots which I´m going to fix tomorrow. |
|


