|
|
Post by busaash on May 12, 2014 12:07:05 GMT
the devil is in the detail alan , it niceto show us lesser mortals as we can learn from the jedi master  top work loving this thread |
|
|
|
Post by strangewayz on May 12, 2014 14:02:32 GMT
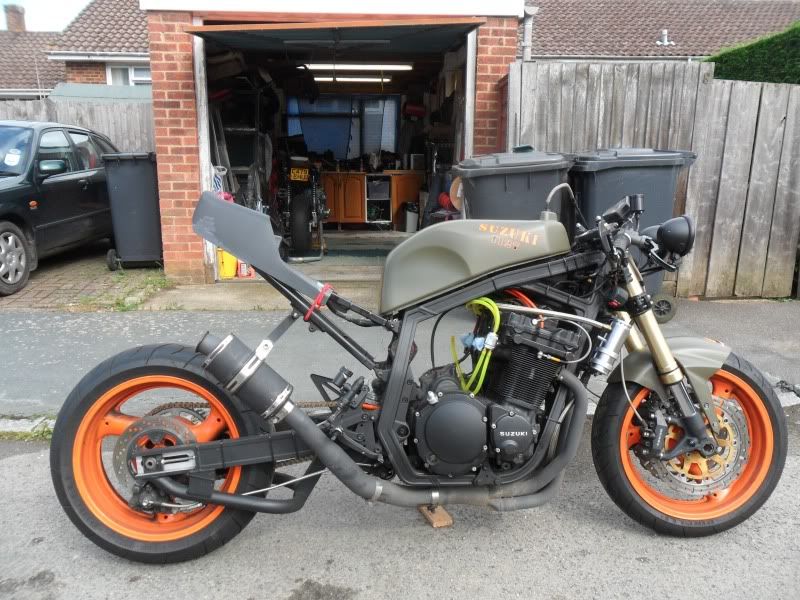
16Not sure about that Ash ! But I needed the force to be strong last night as at the point I discovered the two tanks where slightly different the easiest option was to down tools & go to bed... Another early start, quick look at torque arm route around the link pipe which of course is an excuse for Racefit pics !  This is where I get garage envy, having to strip bike down to get it through the house (so I can take it to Stevea's for seat upholstery). 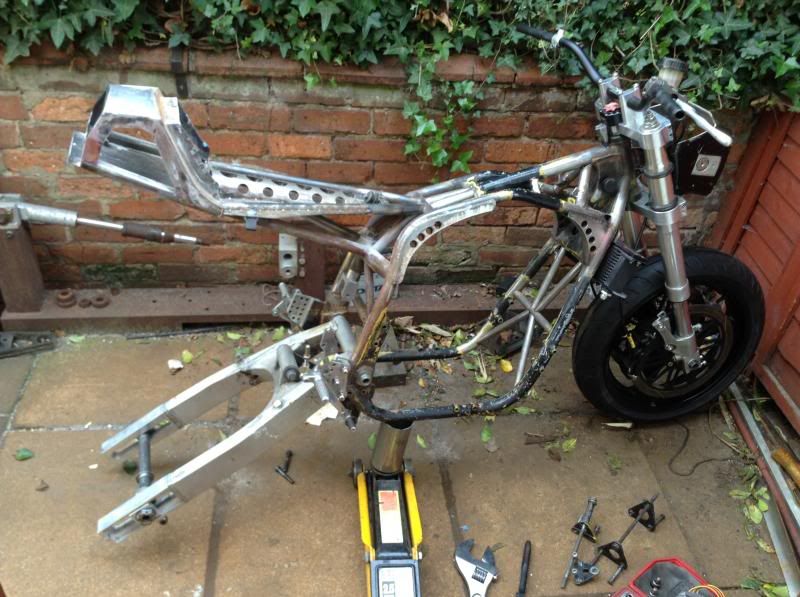 Humour running out at this point, tried to leave a few bits on the frame to make it quicker to build back up outside front door, had to perform a stoppie to get the back end through the door... have seriously out grown my terrace house with no rear access. Oz was good value, stand exactly where the bike need to be moved & then laid a smelly mine field in the yard when I hoofed him outside... bless. 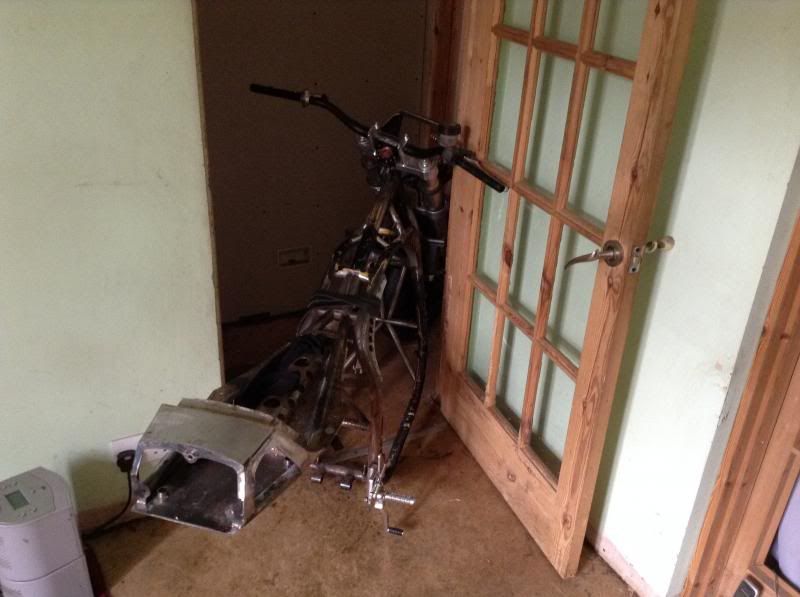 Ahh but progress... VW Caddy so at least I don't have to squeeze a whole bike into a Mk1 Golf GTI (yes I do still have it). 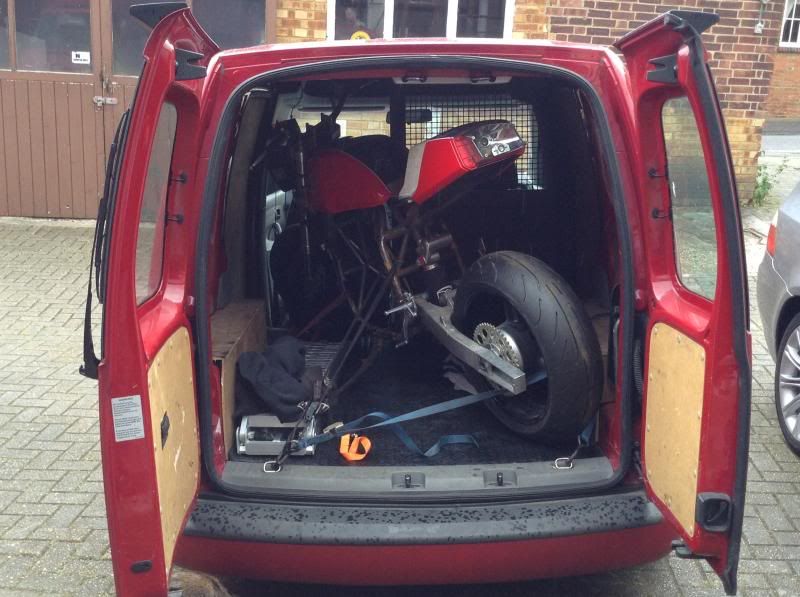 Steve said don't take a picture I've got a coldsore ha ha... should have really but you get this instead aka Lucky 7 Motorcycles..  Bike unloaded, seat design discussed I became tea boy runner & went to the local cafe for take outs... on my return Steve says "there you go good as it gets..." Wish my fabrication jobs were that quick & easy. 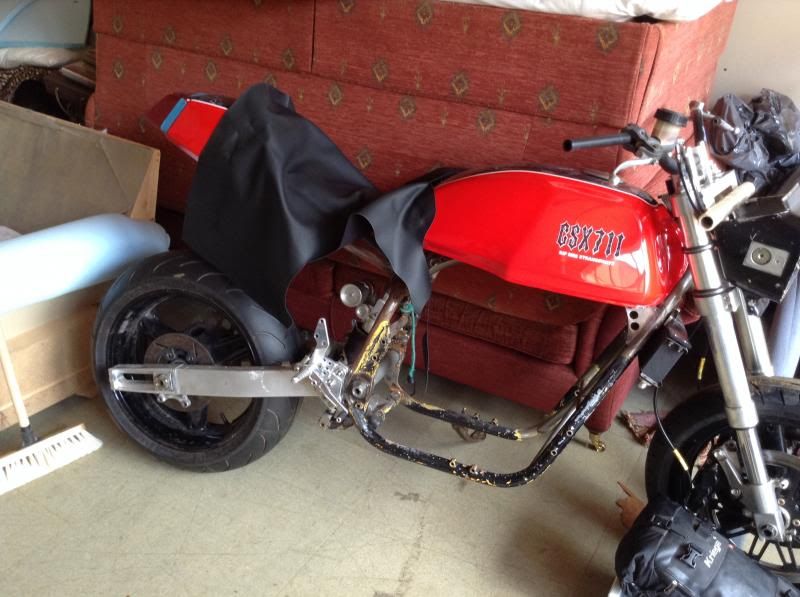
|
|
|
|
Post by maggotbreath on May 13, 2014 3:07:33 GMT
Awesome work and stoked to see you back at it with a vengeance!!!
|
|
|
|
Post by strangewayz on May 13, 2014 14:46:14 GMT
15Not a good day for me but as Stevea is working on my seat at least progress is being made, still hopeful of being able to collect my rolling chassis from him tomorrow. Below I have some pictures of some other 711 parts which are in progress. My bad juju started when I got back into town around 11pm after work last night, driving along "something" dropped down on my Caddy van & dug into the road.. The long hours I've been doing recently the last thing I needed was to be lying in the road sorting that out by phone torch light..  And the winner is.... Front anti rollbar drop link, had actually broken the mount on the coilover which caused it to drop. 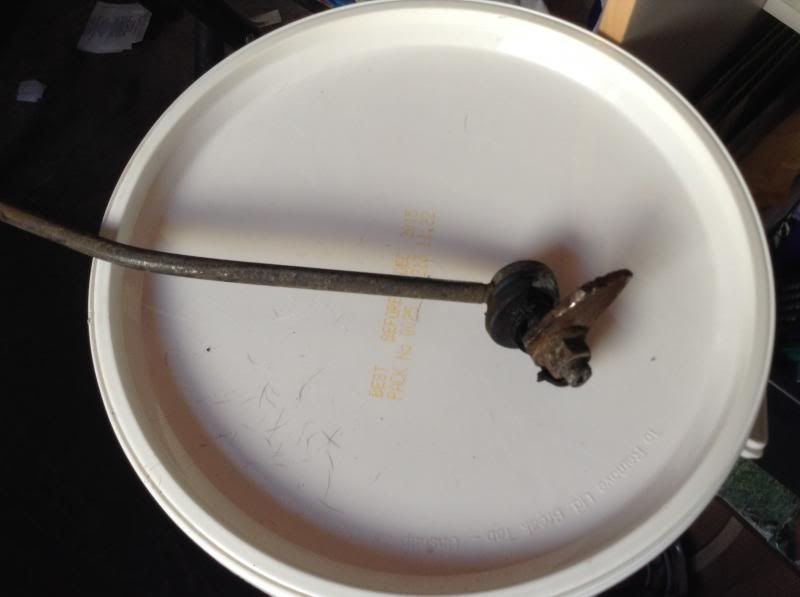 Bit of time this morning to get that off & actually can live without it for a while but whilst underneath found a tyre issue which I have to sort out, trouble is that comes out of the same pot that I need to finish the 711  How's the betting going  hey I'll ever keep this up into '-' days if I have to smiley-shocked003 Stop talking & post pictures... ok I hear you ! Super Larry had done a little bit of milling on my electrics plate that will be rubber mounted in the tail piece. 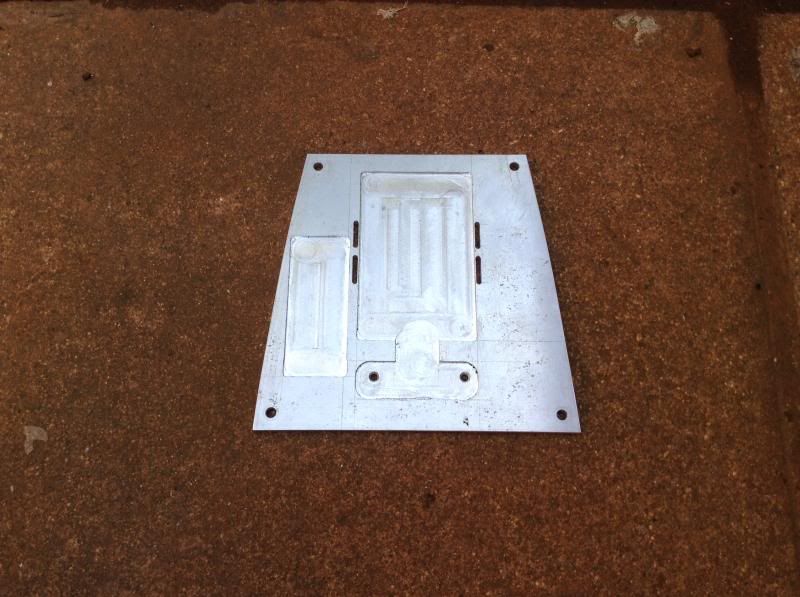 Works like this, my job this morning was going to be to make the plate which will be welded in at 90 degs to the main plate which the Dyna 2000 will mount to. 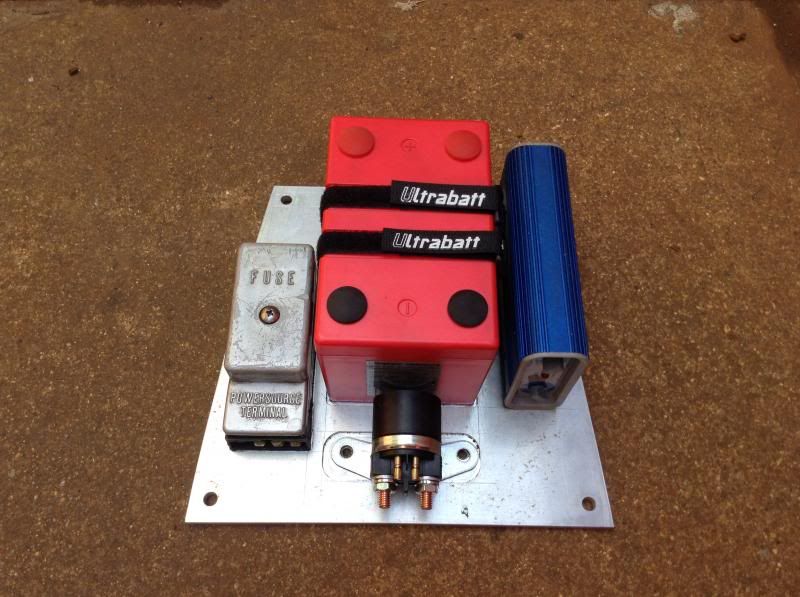 This is my classic styled AP Racing rear master cylinder to match the front, wanted to go with the Oldskool white pots... 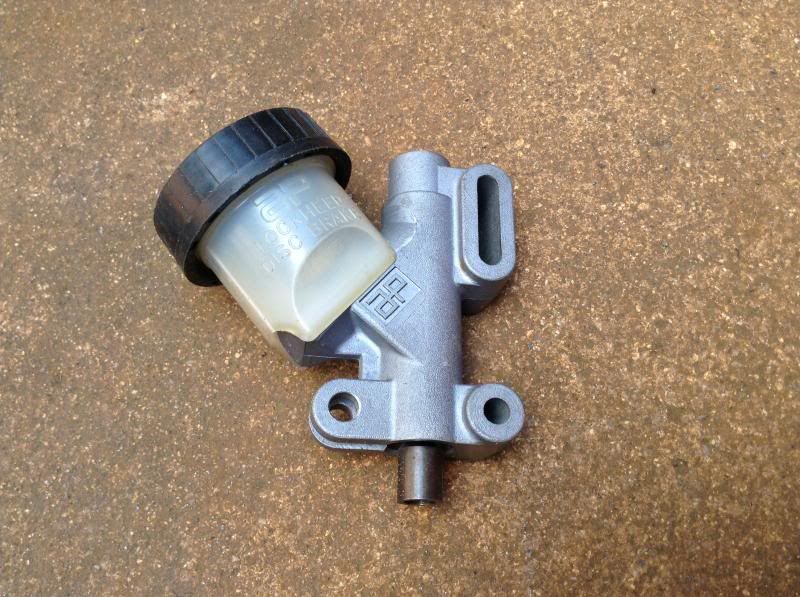 Plans for the torque arm are to run the brake fluid actually in it, bought some alloy tube, have the adjustable rod ends from an old torque arm which will be welded in to 'seal' the ends & also two fish mouthed pieces of alloy that are tapped m10x1.0 for the banjo bolts which will also be welded to the tube, one each end.  When I first started work on the frame I designed an adjustable swingarm pivot & whilst the details of that got lost on the old OSS site in simple terms think of a frame swingarm bush that whilst one piece has two parts to it. The inner section was a simple slot that the spindle was able to move up & down in, the outer section housed an insert which had a fixed spindle position ie the spindle could not move up & down. By altering the spec of the insert you could change where the spindle was 'fixed' in the slot. The slot dimensions were calculated to enable the spindle to be moved a max of + - 5mm from the stock position. Super has made me some new inserts, these are my Mk2 design because they have a section which also goes into the slot as well, he does not have CNC & these took him 15 hours to make, lot of skill in that!! The pictures show two sets, one with the spindle in the central or stock location, the 2nd set is 5mm off centre & of course that can be flipped 180 degs to either raise or lower the spindle 5mm. I intend to fit these with the spindle lowered 5mm which will reduce front trail to quicken the steering & also give a more aggressive body line sloping forward. 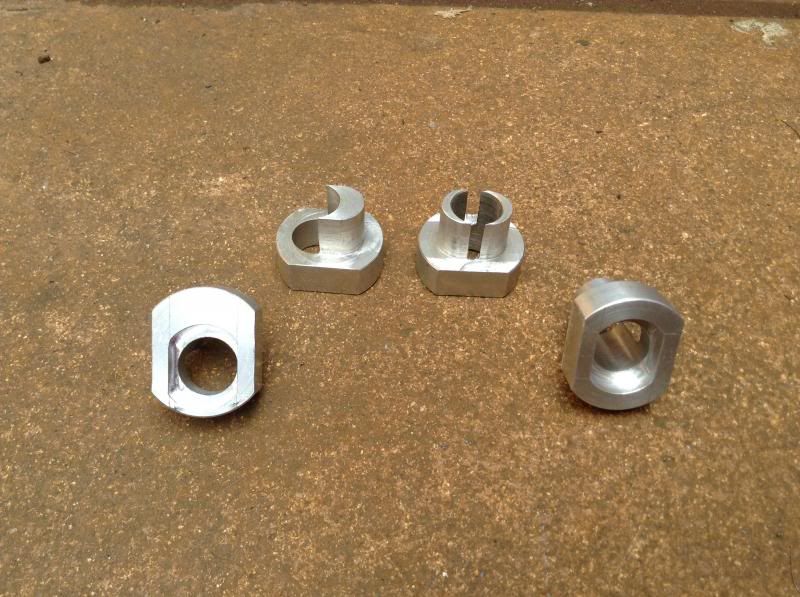 You can really start to see why I never seem to finish one of my own bikes, too many ideas not enough time !
|
|
|
|
Post by pedda on May 13, 2014 14:57:58 GMT
Oh how I love that idea with the rear brake fluid routing...
|
|
|
|
Post by clivegto on May 13, 2014 19:15:53 GMT
Oh how I love that idea with the rear brake fluid routing...
Me too, will be interesting to see which setting you end up using with the swinging arm spindle. Keep pushing you will get there m8, top work as always.
|
|
|
|
Post by stuey on May 13, 2014 19:21:26 GMT
looking good alan you will have to pop round when yer over and grab a beer so I can have a look at the bike  |
|
|
|
Post by strangewayz on May 14, 2014 14:21:57 GMT
14Thanks for your comments yesterday, I was a bit down after my van decided it needed me to spend time & money on it, it's only bloody jealous of the 711 !! Small wheelbase Caddy which you can fit a bike in the back without too much trouble, the bulkhead is 1/3 2/3rds so I normally take out the section behind the passenger seat & move the seat forward a bit. Put the bike in at an angle & the smaller of the two rear doors fits nicely up against the back tyre. Strap it down to the D rings in the floor & good to go. I think if your bike was running a long wheelbase it could end a tight squeeze, my old GSXR1100M also fitted in the same. Useless info which might help someone out ! Picked rolling chassis up from Stevea's today, he actually would not let me take any in progress shots of the seat being made which is a shame as I like to show in my project threads how stuff gets done, but I have to respect Steve's wishes. He's actually being a top bloke squeezing my seat in amongst some other work to give me a good chance of getting on the ferry to the IOM... 711 in the sun pics. 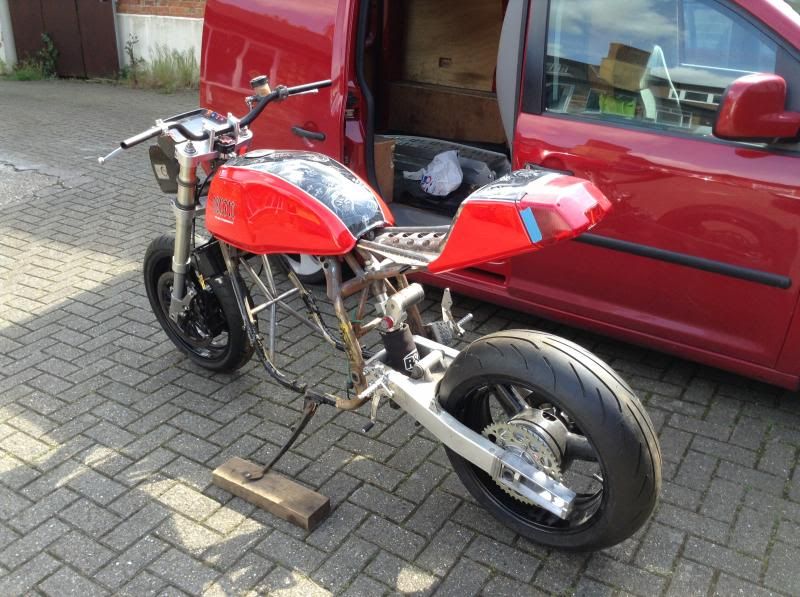 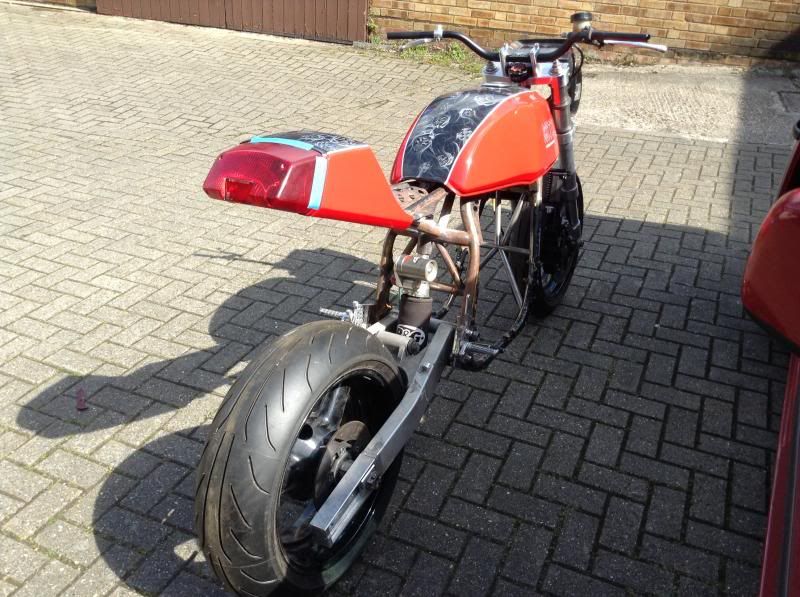 Back home & mostly stripped down, Oz looking really pleased & can't believe I'm taking a picture of his bone to post up... before laughing & saying "you're going when?!!"  Really have to make the next few days count, early start tomorrow with getting in to the final welding on the frame, want to have the frame almost completely done by end of Sunday & there are still some small fabrication jobs to do on it. Taking this to be on the OSS stand Saturday May 24th @ the Kempton Park Southern Classic Bike Show & Autojumble. Think I'll still be looking at wiring Sun 25th & Bank Holiday Monday 26th... which mean maybe earliest mot Tues 27th & the ferry goes 28th. Motors built but not been run, carbs not been set up so I know I'm up against it. But I'm still smiling 
|
|
|
|
Post by gray7/11 on May 14, 2014 19:27:05 GMT
Good that you're still smiling ..... I'm sure if anyone can do it then you can Alan.
Really looking forward to seeing the beauty on the road, will be a momentous day .....
|
|
|
|
Post by gammaboy on May 15, 2014 0:05:26 GMT
What's the bore on those AP rear masters?
|
|
cj
Velociraptor

Posts: 27 
|
Post by cj on May 15, 2014 8:24:40 GMT
Awesome work as always mate
|
|
|
|
Post by strangewayz on May 15, 2014 14:30:19 GMT
What's the bore on those AP rear masters? I'll try & find out for you, I got this one 2nd hand but unused from ebay & it didn't have a spec sheet / original packaging. 13Love welding days Didn't like so much after having got up early to have to sort the workshop before starting, facts of life of working out of an 8' x 6' shed... 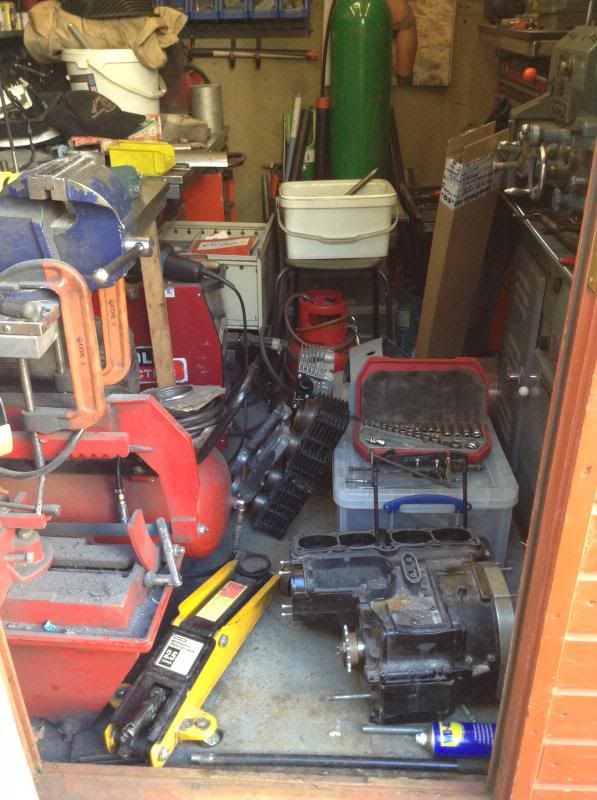 I'll throw some other welding info in here to maybe make it a bit more interesting, I'm not a pro welder just mess about in the shed during my spare time but these things work for me. Used my redundancy from a job loss back in something like '05 to buy this used Kemppi for £1200, oldskool but cool, can run single or three phase, can run a watercooler & is AC/DC so in principle I could also weld alloy with this. I purposely have not gone down that route because I like messing with steel frames & if I weld alloy I think that what people hunt me out to do would start to change. 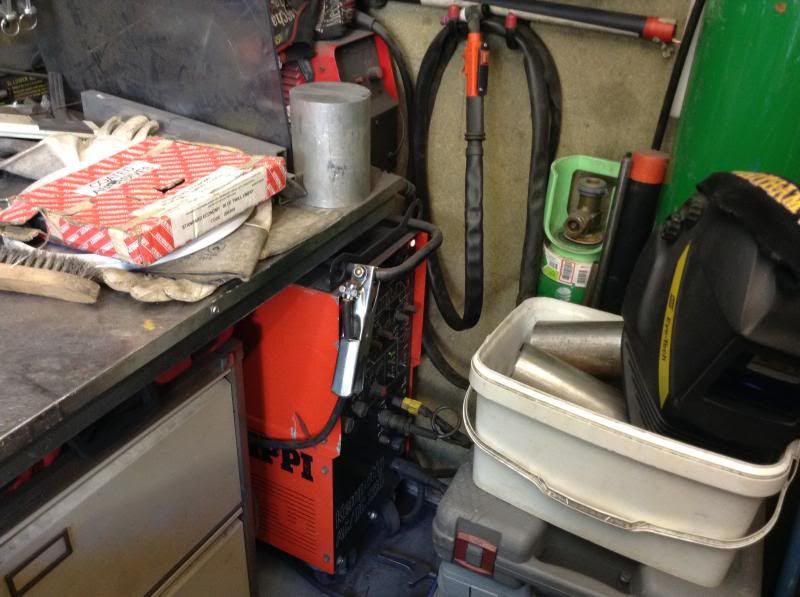 Not everyone knows the difference but this is a Tig machine, most people are aware of Mig which is where a coil of wire is fed down a harness when you press the trigger on the torch. The electrical current is transferred via the tip in the torch nozzle to the wire which creates an arc between the wire & the workpiece, the wire ruptures & gets deposited into the weldpool but as the wire continuously feeds when the trigger is depressed that happens many times a second. Tig differs because the torch has a tungsten which is not designed to become part of the weld pool, the electrical arc is created between the tungsten & the workpiece, forms a weld pool but metal or 'filler wire' is only deposited into that weld pool when you feed it in with the other hand which is not holding the torch. My personal view is that Tig enables you to be more precise, certainly I do not think I could do some of the things that I have done if I did not have a tig welder, which is why I purposely bought one. I have an account with BOC & for welding mild steel & stainless I use pure argon, typically on mild steel I wll flow 12 ltrs a minute, with the thickness of metal I weld I could drop that a little but 12 seems to work for me. I'll up that to 15 if I have to extend how far out of the torch I have the tungsten sticking (to get into a difficult place) or if I am tac welding outside because the wind will mess you up! 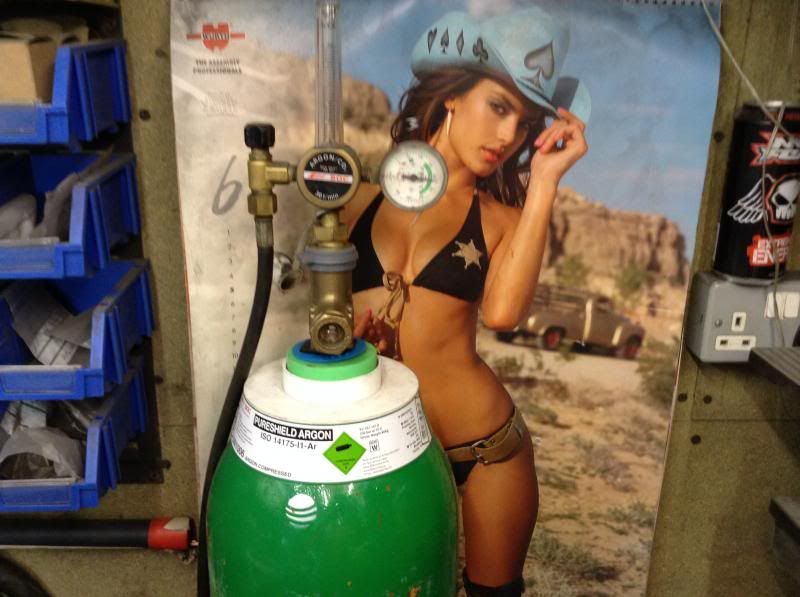 I also use this device to get a consistent tungsten stickout which works for most situations, dedicated stainless steel brush used on the area to be welding. As these are old frame typically they will have rust, paint, powder coat etc which I have to remove first & then the brush is the final prep that I do. 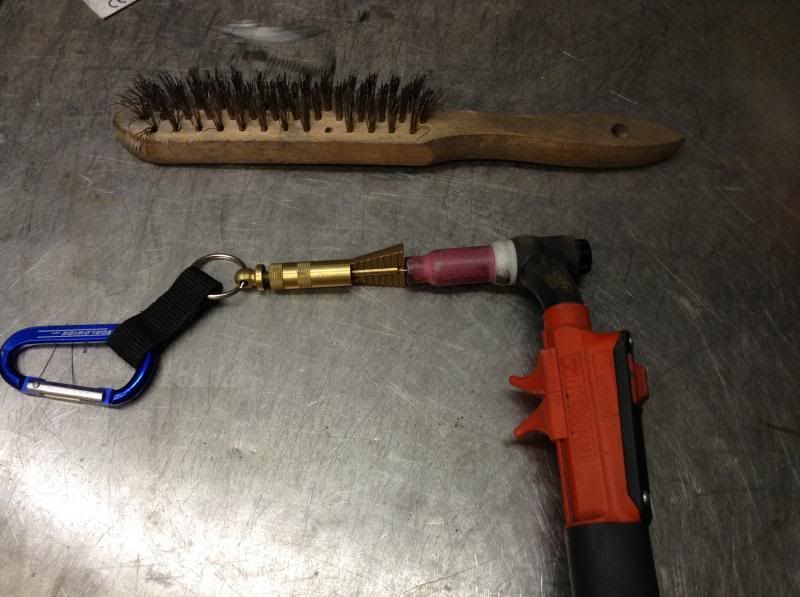 Had both my elbows pinned & plated after braking them in a motorcycle accident years ago as well as my right wrist, left me with not full movement in my right arm & whilst I can weld I need to be able to move the work into a good position for my arm & also rest some part of my lower arm on something to give me a firm base to weld from. These clamps work great when half the frame is hanging off the workbench & there is nothing obvious to lean on ! 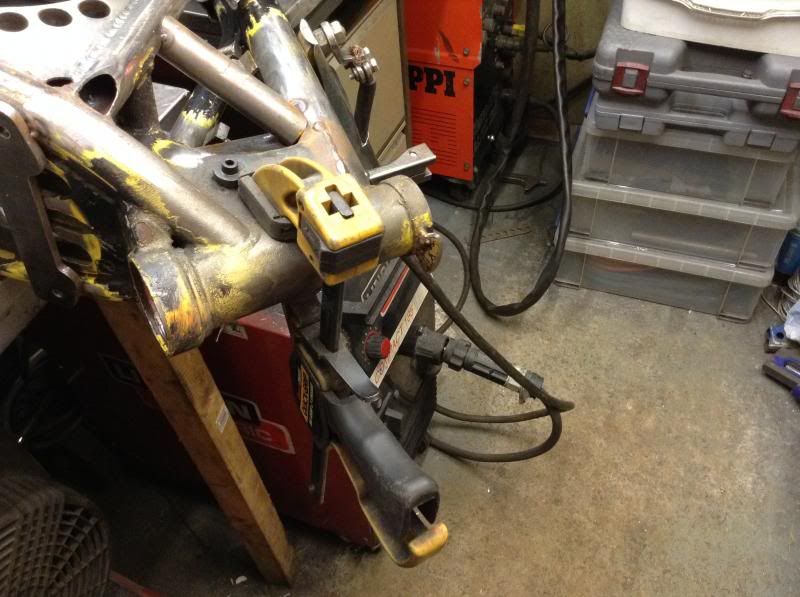 Turning the frame to give me the best position to weld can be a pain in the ass inside an 8' x 6' shed filled with kit, have broken a few light tubes this way... 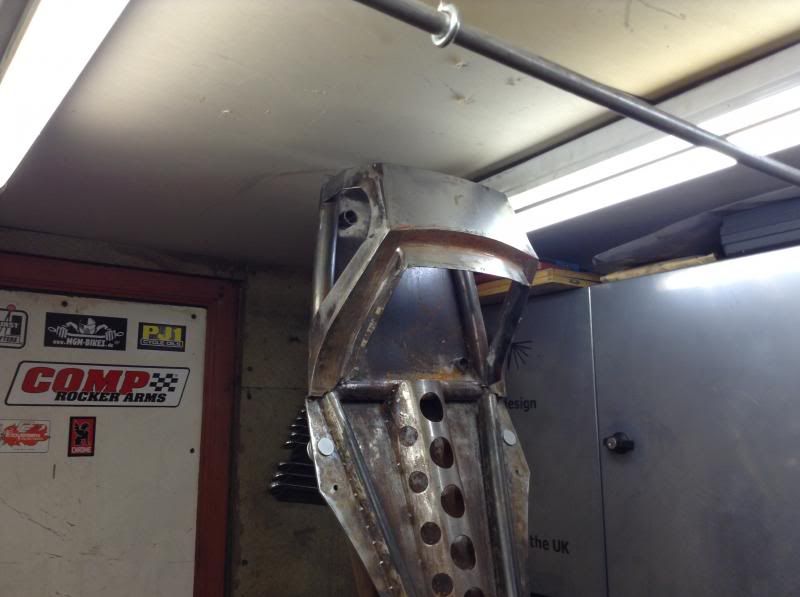 First up today I welded the GPR steering damper mount, does look a good weld but however I sat the frame the light did not catch it right for a good picture. 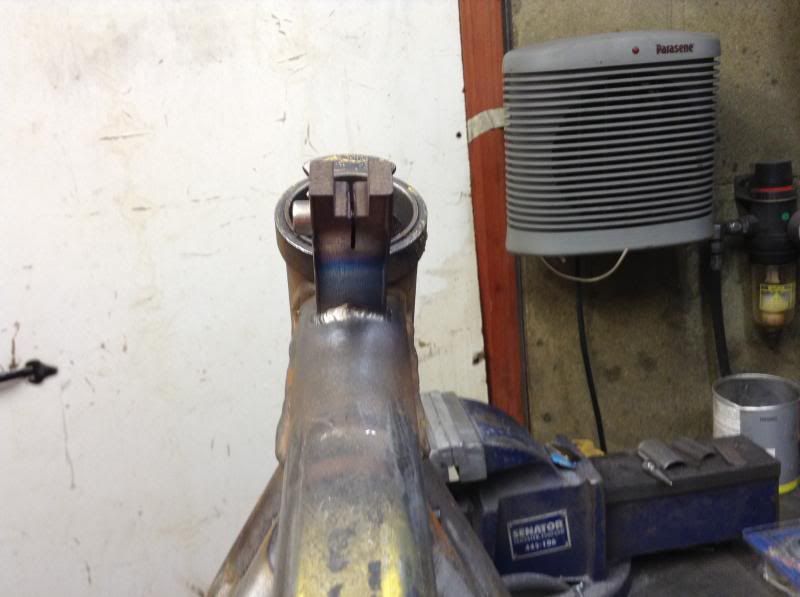 For my oil cooler mount I exactly recreated the shape of the HEL bracket out of steel which I had tac welded to the frame a few weeks ago, idea behind this was it helped that bracket blend into the frame & gave good support for it. 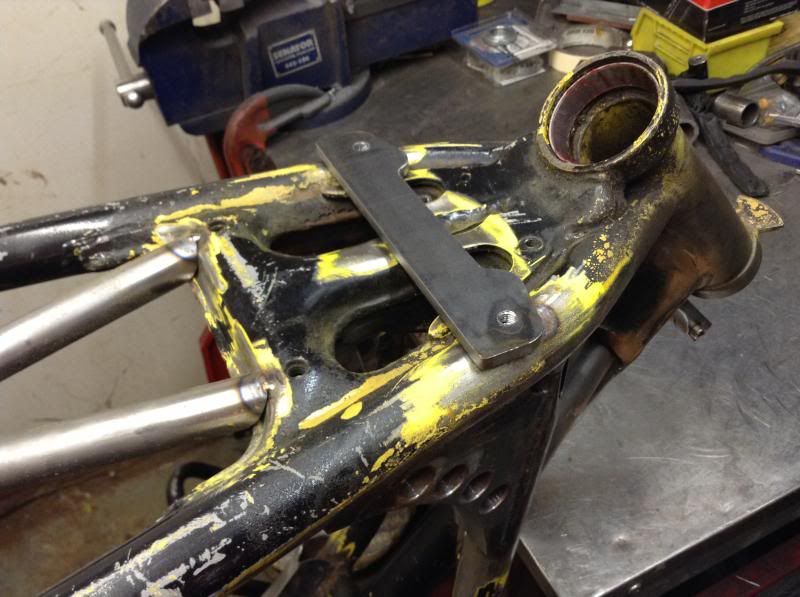 This pic shows the really difficult to remove powder coating almost getting in the way which I have battled with all through this build. 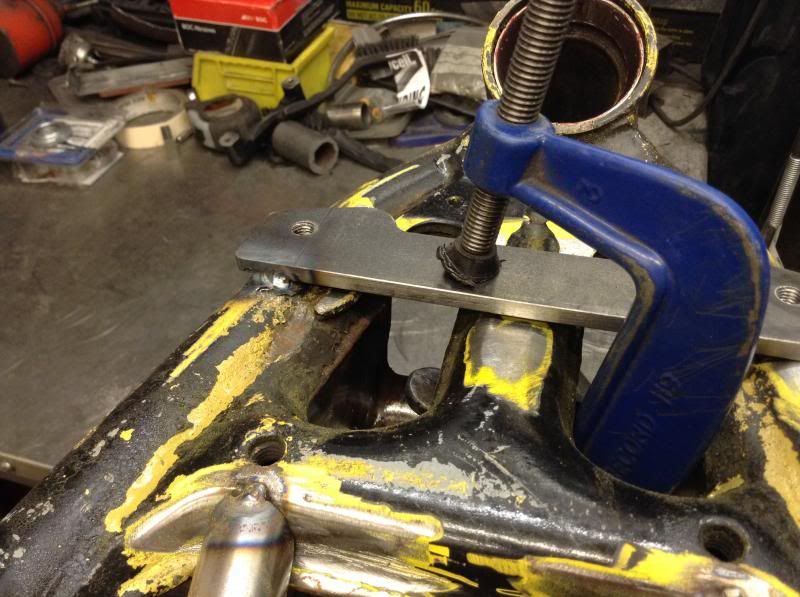 Last few welds on the topside of the bracket. 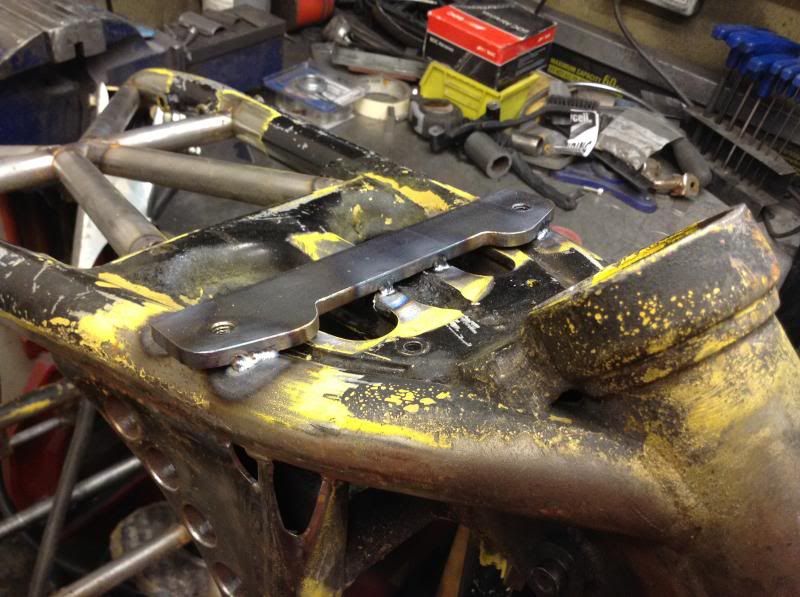 Onto my reg / rec mount, here you will notice two small holes drilled in the adjacent cross tubes that I will be welding to. The reason for those is that when you start to weld the gasses inside that (sealed) tube start to warm up & expand, eventually if you are unlucky that pressure will force the gas to escape through your molten weld pool & ruin your day. Cutting a few of these frames up you will actually find these holes drilled in a few tubes from the factory. I will do my welding on the reg rec mount, let the frame cool & then quickly weld the holes up. 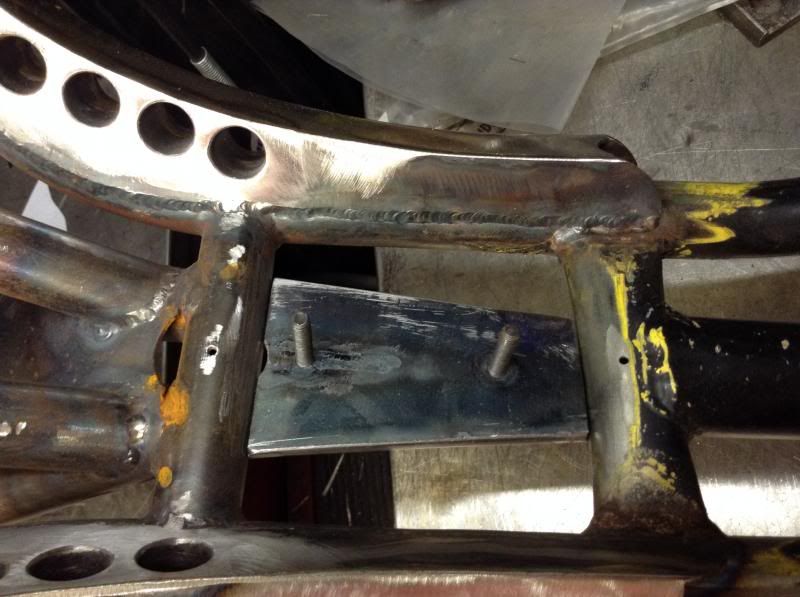 One side welded. 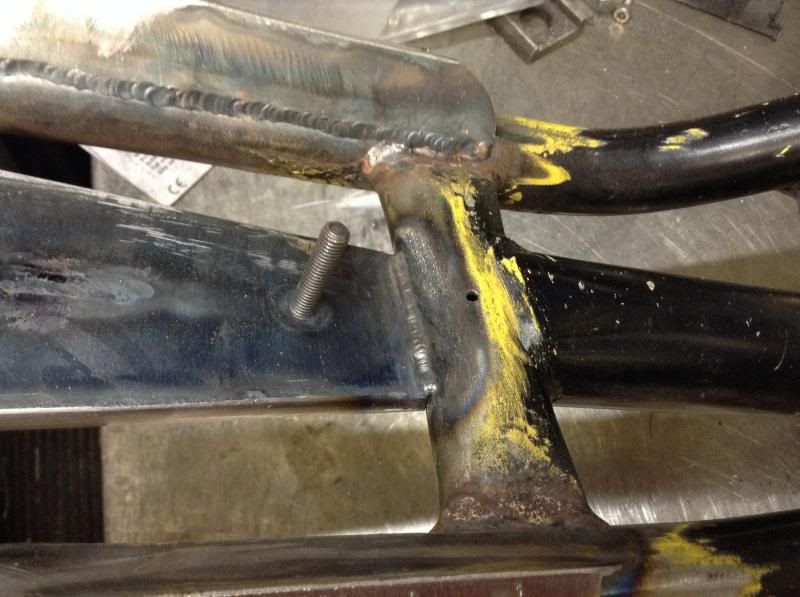 Here I have done two similar 1/4 tube welds as this was a good position for me, next I would turn the frame to a better position for my arm to complete the weld. 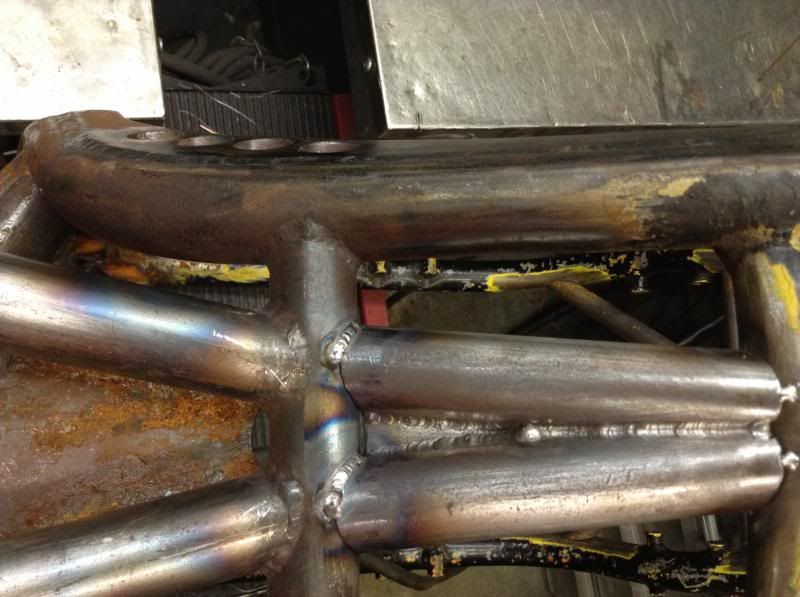 Lastly I do still use my mig, makes a great pull out welding table ! 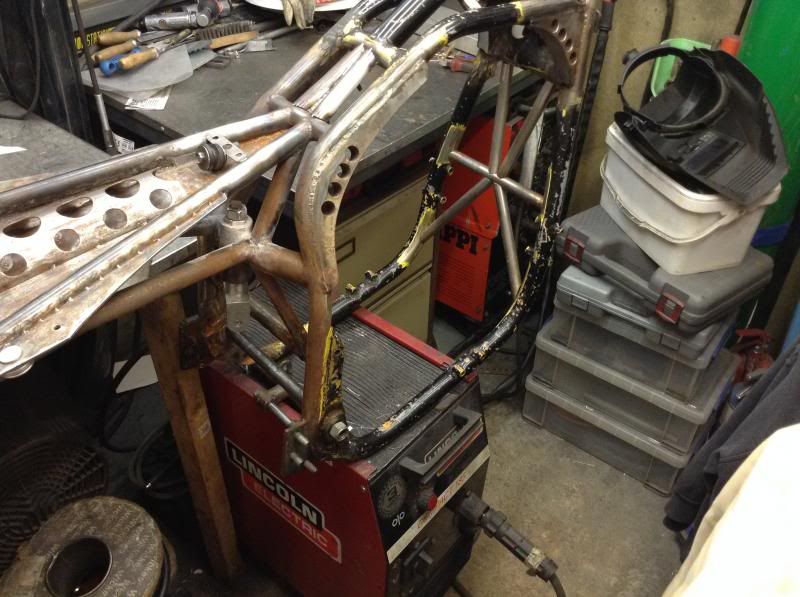 |
|
|
|
Post by captain chaos on May 15, 2014 16:39:05 GMT
you need a proper garage Alan..... the you could make much more awesome stuff.
Credit to you for doing all this in a toilet sized shed.
|
|
|
|
Post by busaash on May 15, 2014 21:15:48 GMT
Very detailed , love this thread  |
|
|
|
Post by danny4646 on May 15, 2014 23:34:06 GMT
Man cave porn! Love it top work!!
|
|


 top work loving this thread


 hey I'll ever keep this up into '-' days if I have to smiley-shocked003