daz
Velociraptor
 ow much do you know I'm from Yorkshire
Posts: 31 
|
Post by daz on May 16, 2014 5:53:36 GMT
Fantastic,your skills are a joy to behold
|
|
|
|
Post by gammaboy on May 16, 2014 6:55:27 GMT
What's the bore on those AP rear masters? I'll try & find out for you, I got this one 2nd hand but unused from ebay & it didn't have a spec sheet / original packaging. Cheers, that would be awesome! I never cease to be amazed by the work you turn out. Just brilliant. |
|
|
|
Post by strangewayz on May 16, 2014 15:07:25 GMT
I'll try & find out for you, I got this one 2nd hand but unused from ebay & it didn't have a spec sheet / original packaging. Cheers, that would be awesome! I never cease to be amazed by the work you turn out. Just brilliant. Seems the master cylinder I have is no longer made by AP, think it has been replaced by #CP2232-90 Spec for that : Actual Bore Size 15.87mm (0.625") Stroke 11.8mm (0.46") Weight Kg 0.3 Hydraulic Connections Outlet Thread - 3/8"x24UNF Fluid Capacity 35cc Repair Kit CP5678-1RK If you search the internet for the part number above you will see what it is like. 12Been putting the hours in, got home from work at 10.45 pm last night & did a bit of welding till gone midnight & then up early again this morning. To final weld these bracing tubes & accessory mounts the frame is not in a jig so I try to not get it too hot, I'll set the frame up in a good position to weld & then for example weld some of the tubes that are in a similar position. Let the frame cool for a while & then re set the frame up in a different position. Also because I had positioned & only tac welded some of the bracing tubes when the bike was built up as a rolling chassis on the patio I put some further tacs in place before starting to final weld. Here's what I finished last night (the two tubes that merge the top tube into the upper subframe tubes). 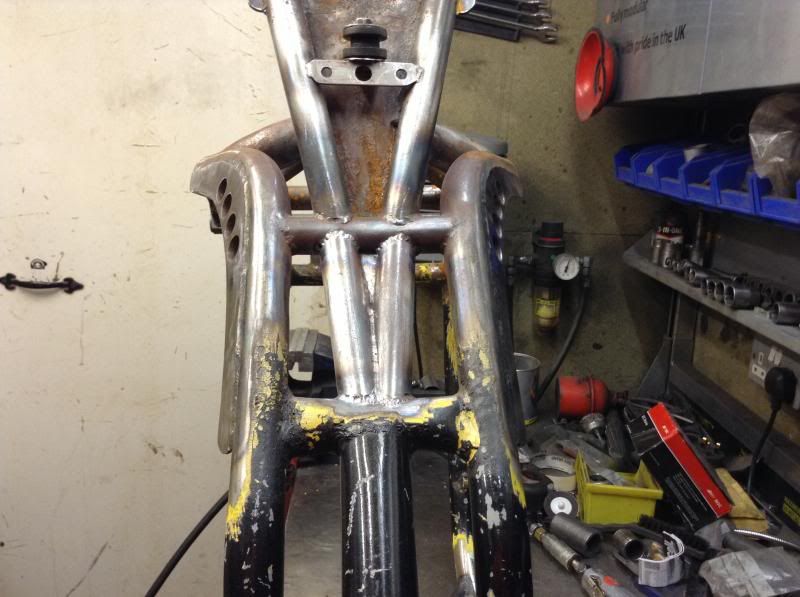 This morning I wanted to do all the bracing tubes in & around the exhaust headers, you can also start to see all the powder coat I still need to remove to get the bare frame look... that's because I've run out of money to get the frame etc powder coated but to get to the TT I don't mind & my plan is / was to run the GrebRod (another project.. GS1000 Turbo) as a bare metal frame so it will be good to learn how to look after it. 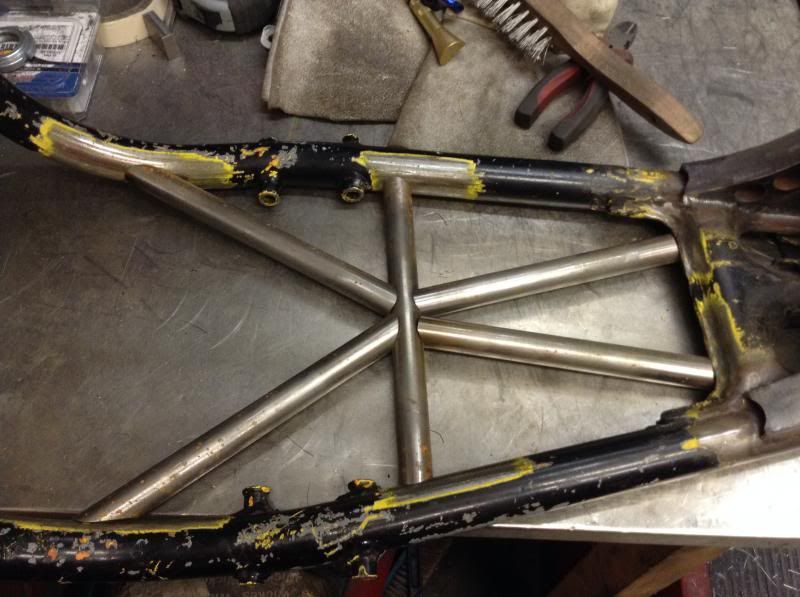 Finished welding the bracing on what is the inside of the frame, also removed some of the powder coating. 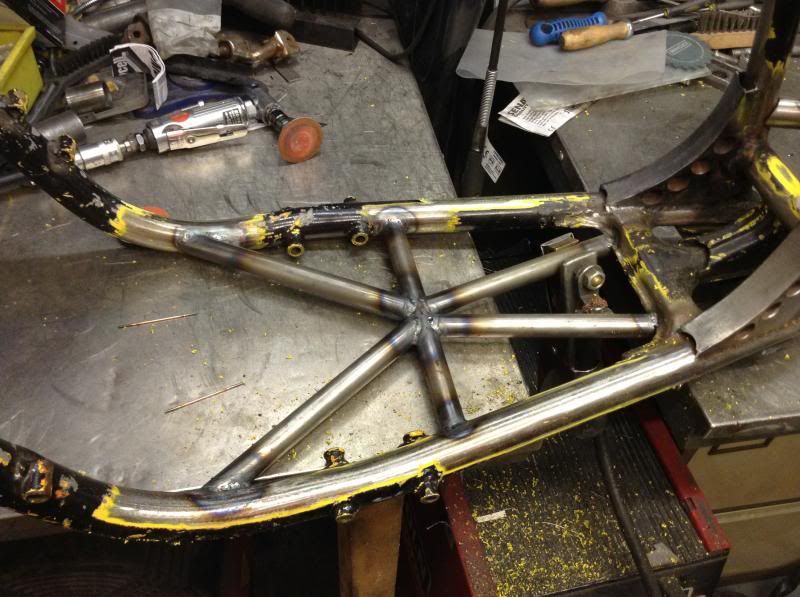 Frame flipped over to weld the outside faces.  Finished them. 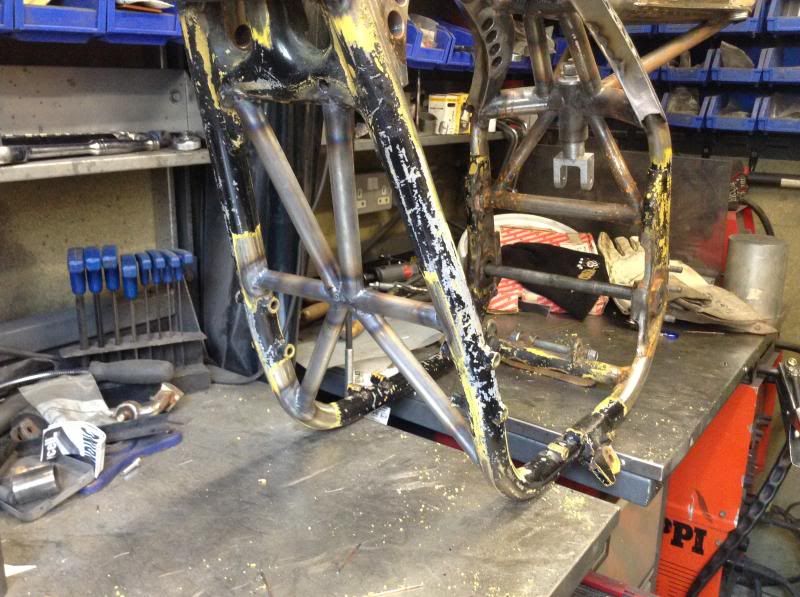 Had to cut short my morning to box up & take to the post office EFE side panels which I sold, they were really nice & had been sitting on the shelf for a few years... the money from them has bought my break in engine oil + a change of oil & a stainless engine bolt kit for this. Sometimes you have to sell stuff to move forward, like also selling my GSXR1100 last month to give me most of the money to get this finished. Left to final weld are only these two tubes up near the headstock & the coils mounts, which will be midnight tonight after work & tomorrow morning. They will be hard to get to with the tig torch on the insides so I was saving the worst till last ! 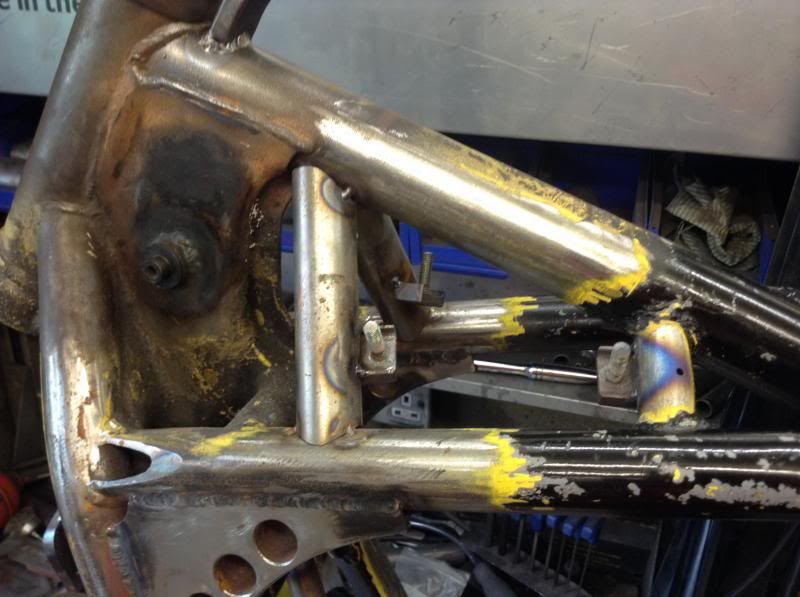 Most of Saturday I want to work on the last bits of frame fabrication : Lock stops Number plate bracket Filling the stock holes for the right hand footrest & smoothing them away.. Need to decide about the lower engine mounts as the lugs on the frame are in the wrong place, I know a lot of people do not use them in which case I might look to 'delete' them as well. I don't want them to still be there & not used but I also need to look at the clock !! Lastly my Goodridge double hydraulic brake switch arrived for my front master cylinder. 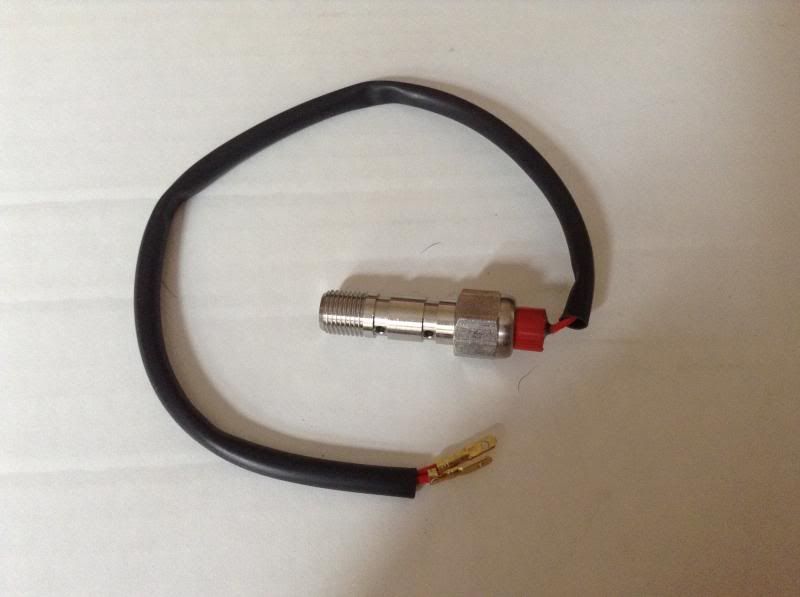 |
|
fastgs287
Oviraptor
Still on crutches- need to make a rack to carry them on the SV
Posts: 11
|
Post by fastgs287 on May 16, 2014 16:07:58 GMT
Just 12 days to go- how many shed hours is that?
|
|
|
|
Post by stuey on May 16, 2014 19:16:10 GMT
alan will do it  ))))))) |
|
|
|
Post by gammaboy on May 16, 2014 22:32:56 GMT
On polished alloy I use silicon spray, but you don't want that shit near anything you are even thinking about painting sometime in the future. The two stroke guys use a floor wax on their pipes, the US product is called "Mop'n'Glow" or something... I reckon that would probably do the job for the bare steel frame, otherwise lots of Brillo and WD40 is in your future...
Cheers for the master details, might start hunting one, my Brembo master is too small and it's easy to easy to lock the rear...
|
|
|
|
Post by strangewayz on May 17, 2014 22:19:24 GMT
11 (Saturday) Tough day, just dog tired, even fell asleep on the sofa waiting for the frame to cool down at one point smiley-shocked029 Also had sit in Saturday traffic jams going to pick up some new vans tires, guess real life gets in the way sometimes !! Got stuff done but not as much as I wanted, really fiddly stuff to weld trying to get the tig torch into some of it. Pictures !! Shows filler plate I made for where I had chamfered the tube to drop the front of the tank lower. 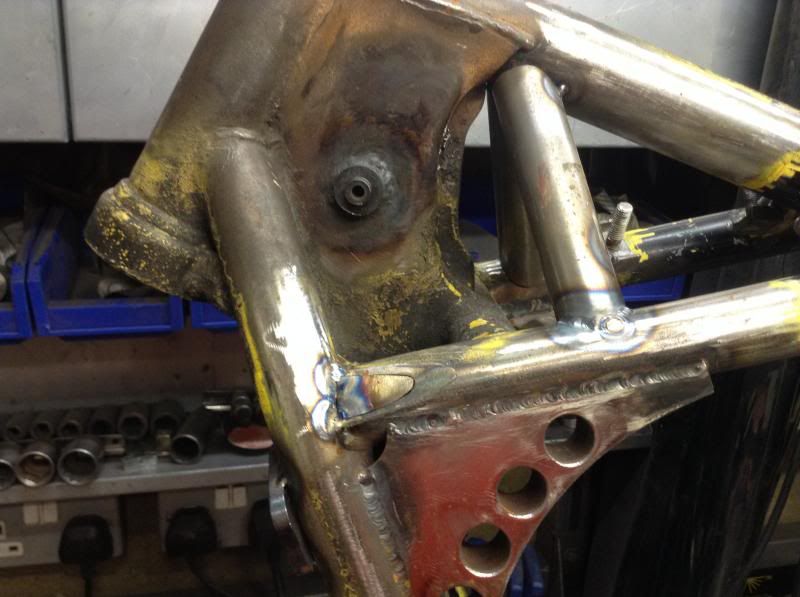 Bracing tube welded & that filler plate welded & smoothed in. 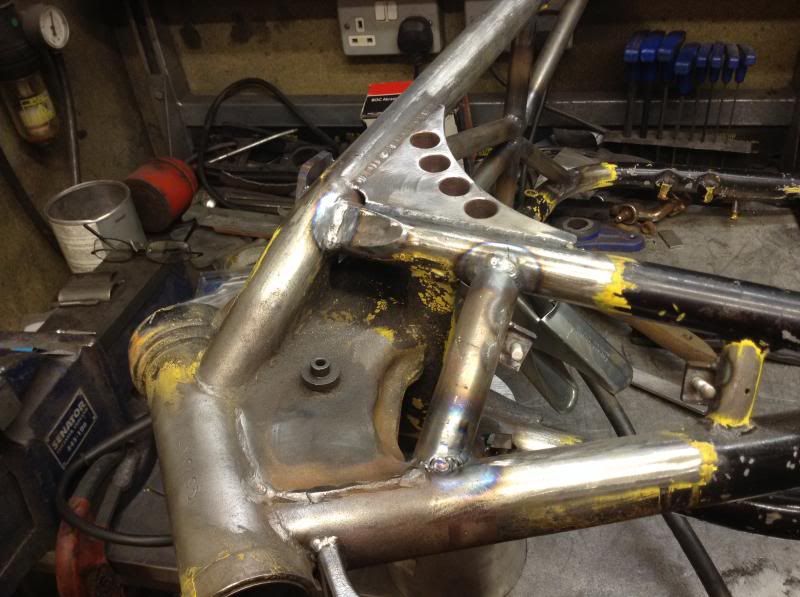 Welded the coil mounts & the insides of the two bracing tubes. 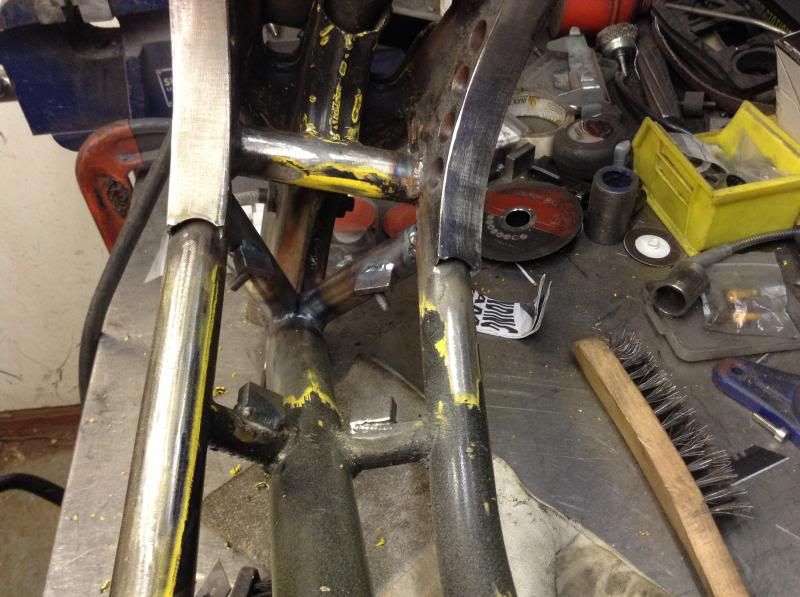 Can you see it ? 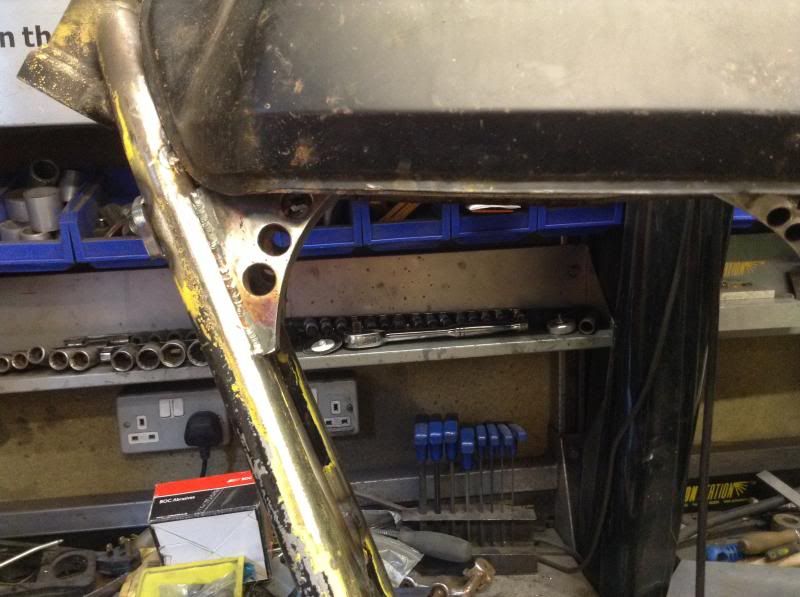 Back when I first positioned the coil mounts I worked out where I could hide away the horn so that it could not really be seen from the side of the bike. 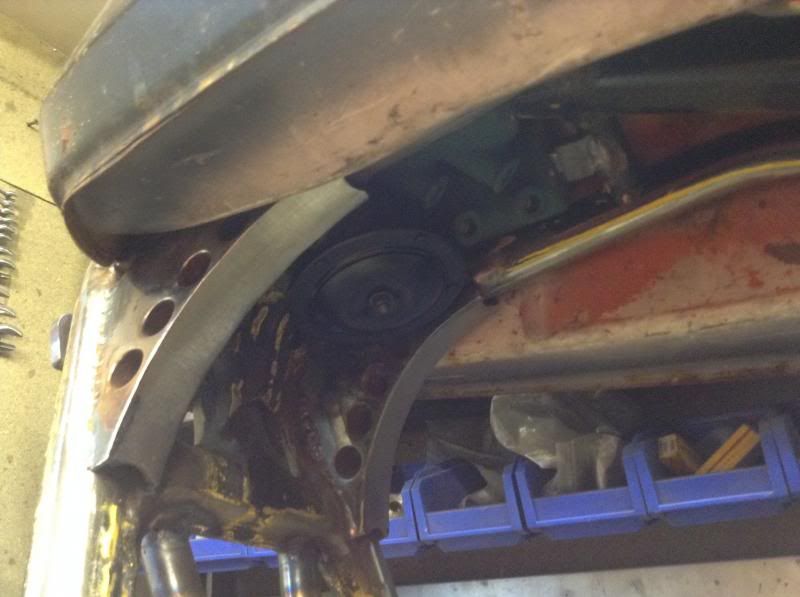 Uses the stock bracket for the horn just cut down, so it keeps the rubber mount. 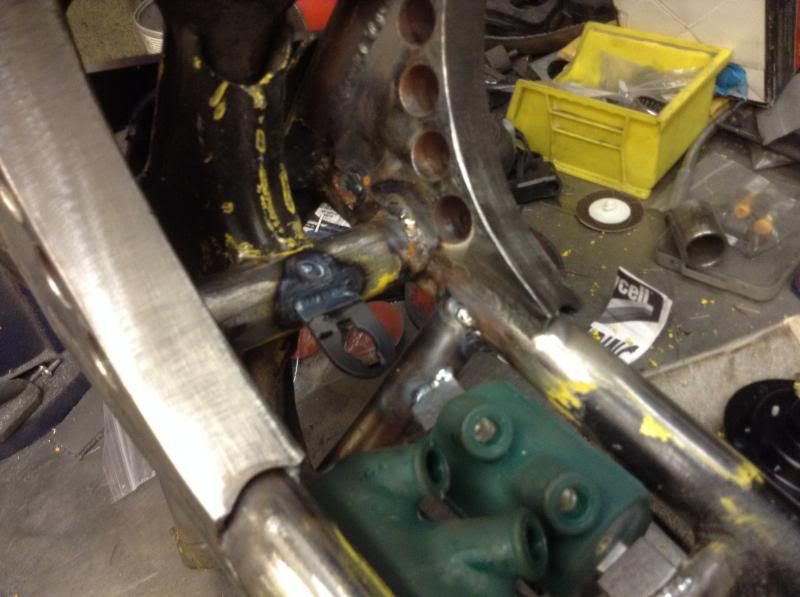 Decided to slightly change the position of the oil cooler bracket, had to cut through my welds, tidy the bracket up & also put some welds into the frame & smooth then from where I had to cut the bracket out pita !! 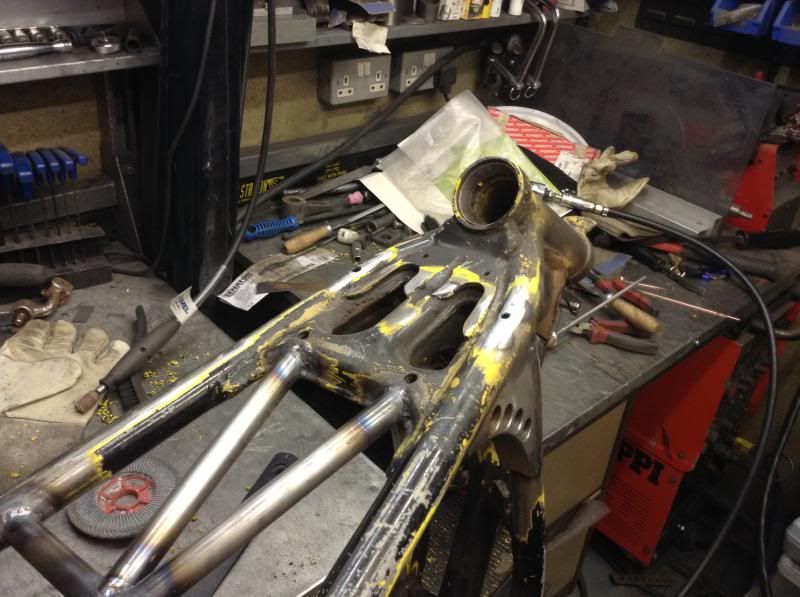 Back in place.. 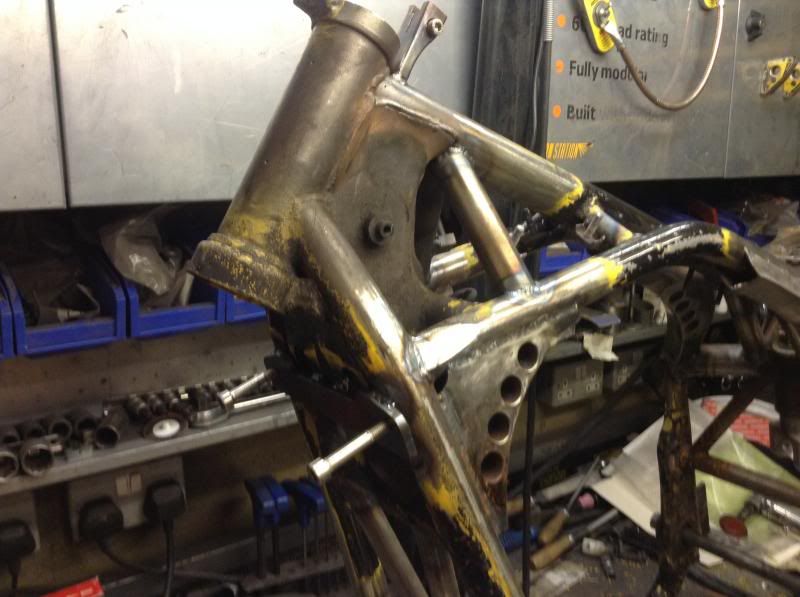 Fiddly day but more things to cross off the list. Not around Sunday morning but afternoon & evening I will be doing some alloy fabrication so that I can drop stuff at the alloy welders Monday morning. Might get chance to look at the lockstops as well.
|
|
|
|
Post by busaash on May 17, 2014 22:34:07 GMT
Your still making progress alan , looking good , and you will be able to powdercoat when you get back from t t  |
|
|
|
Post by strangewayz on May 18, 2014 23:01:27 GMT
10 (Sunday) Had to go out in the morning so only got into this midday onwards, was going to do some alloy fabrication but continued with the frame. These are the two stock right hand footrest bushes that I wanted to delete, already did the left hand side whilst doing the chain cutouts. 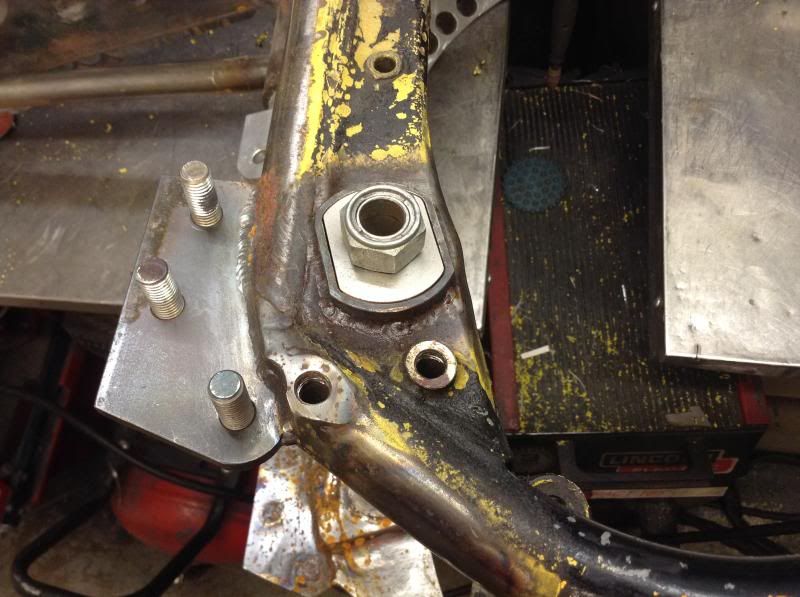 Got them close to fluse with a grinder, wound a mild steel bolt in, cut the head off, ground it flush, welded it up, smoothed the welds & then got rid of loads of the powder coat, looks a different frame in this picture... 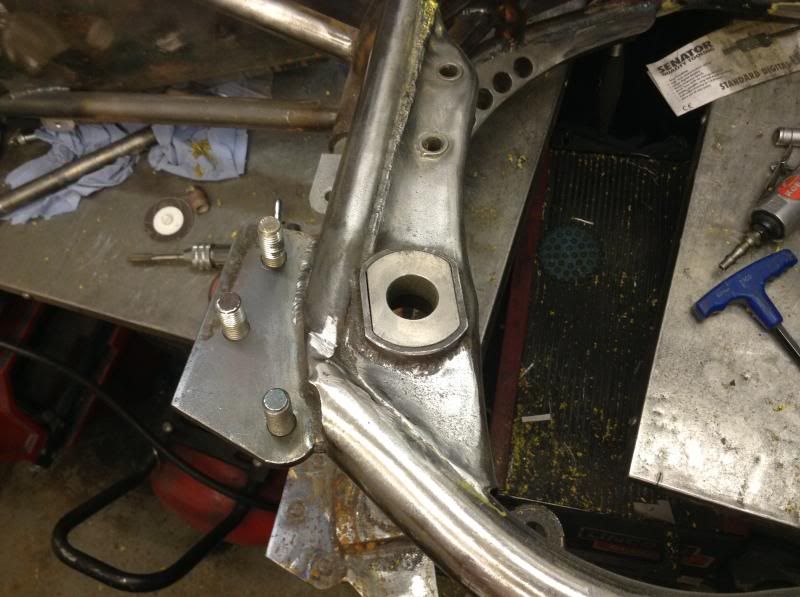 Inside of the frame was the same but did not want to leave them as open holes. 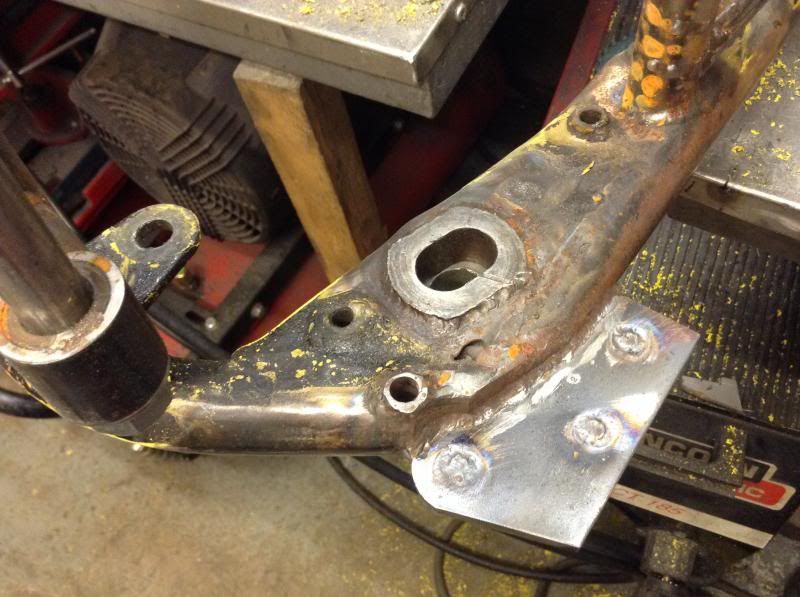 Did these same as the front but just made them flat, no need to blend them into the rest of the frame. 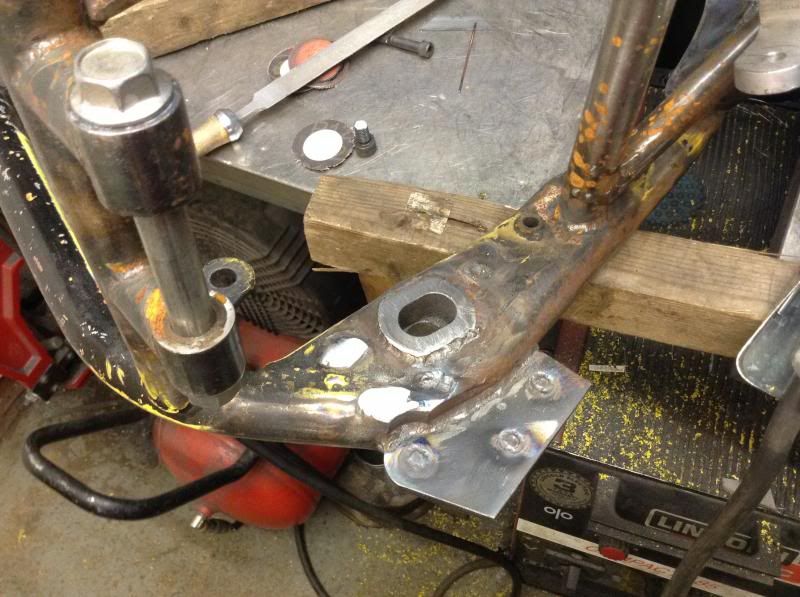 Few smaller things I also welded up, spent a lot of time getting powder coat off, getting there with that. 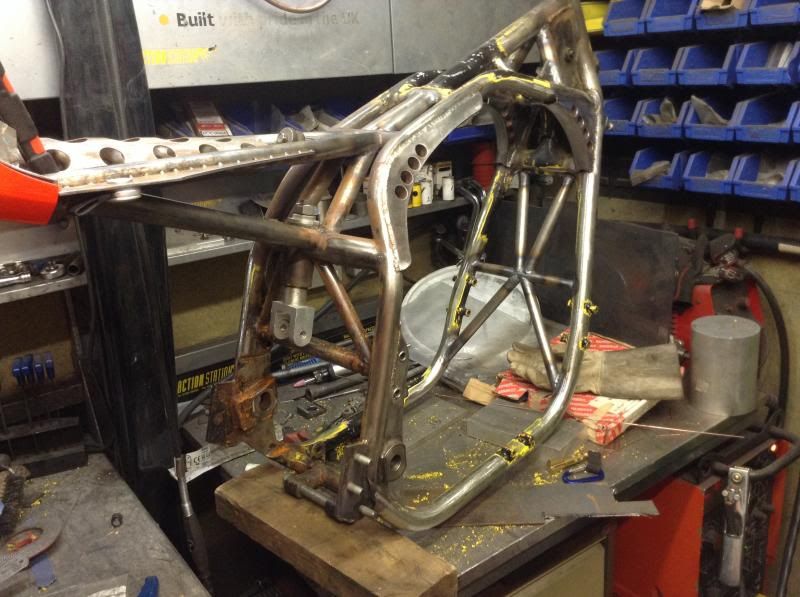 Have the parts to make an adjustable number plate bracket, not cable operated, adjust the angle & then tighten the allen bolts, need to make the bracket part which the number plate will attach to which will be welded to the two inner 'bushes', the two outer bushes will be welded to the frame near the back light. 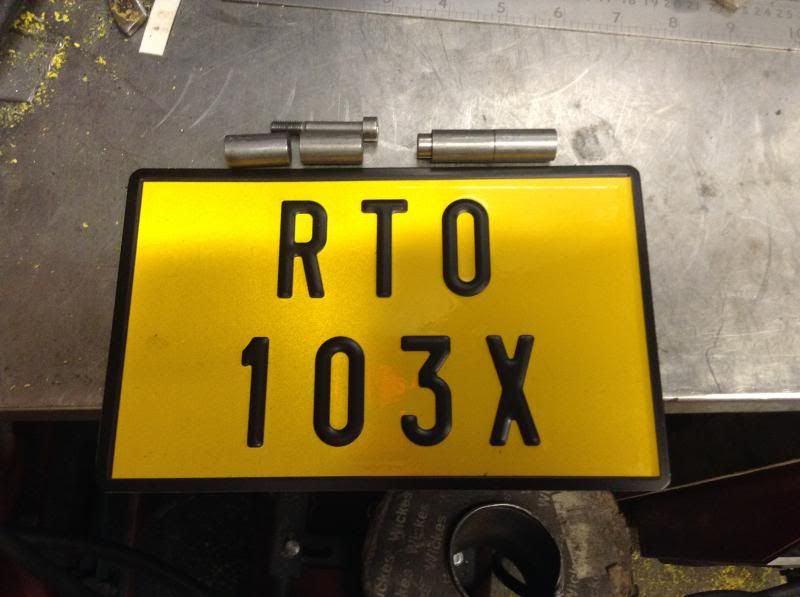 Before doing that I needed to fill this gap, stop water getting in from the back tyre. 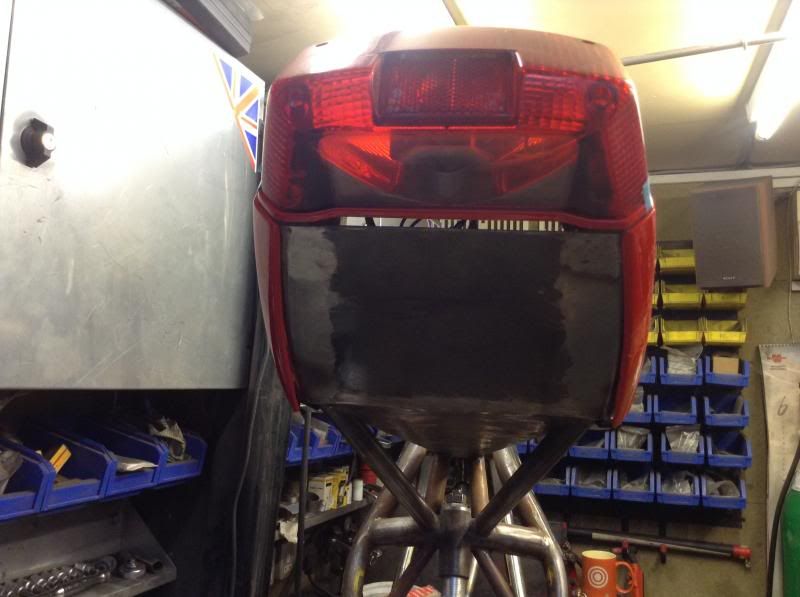 Piece of steel cut to size & test fitted, being held in place by two magnets in this pic. 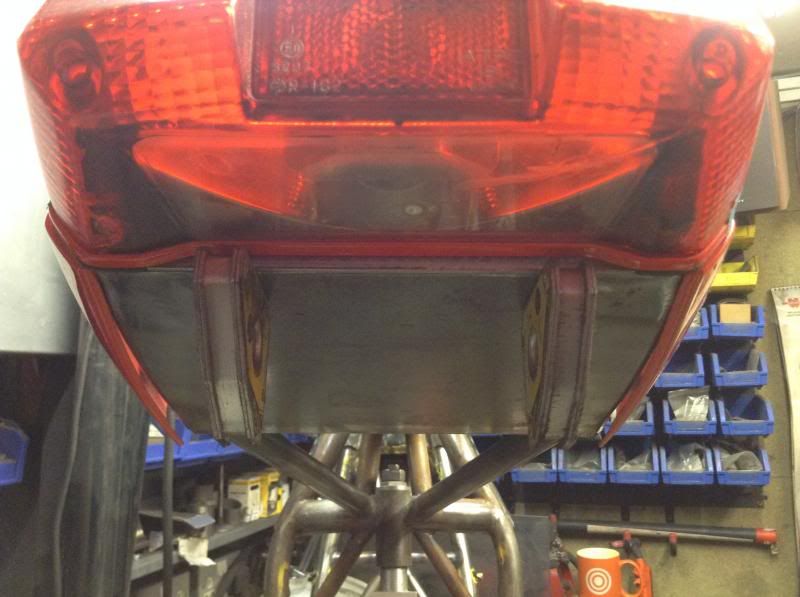 Welded in place from the underside & smoothed flush, this is the inside, the piece I added makes a good edge for the bottom of the tail light to sit against. Good pic actually as you can see how my steel inner tail section works with the 3 stock bolt positions of the rear light. 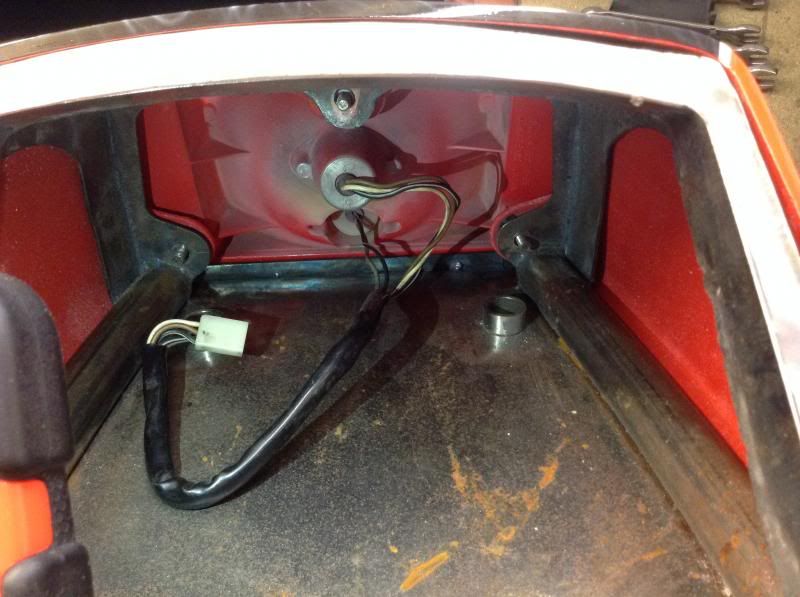 More stuff ticked off the list & tomorrows just another day...
|
|
|
|
Post by busaash on May 19, 2014 9:27:54 GMT
looks the bomb alan , getting closer every day  ninja skills |
|
|
|
Post by strangewayz on May 19, 2014 15:05:29 GMT
9Needed to get a bit more done over the weekend really, but all I can do is get in the workshop & keep finishing things to cross off the list  Fabricated the number plate mount this morning, bit different to how I described above but I'll show you the pics.  Used a razor blade when welding to make the gap for the outside bushes to be able to pivot. 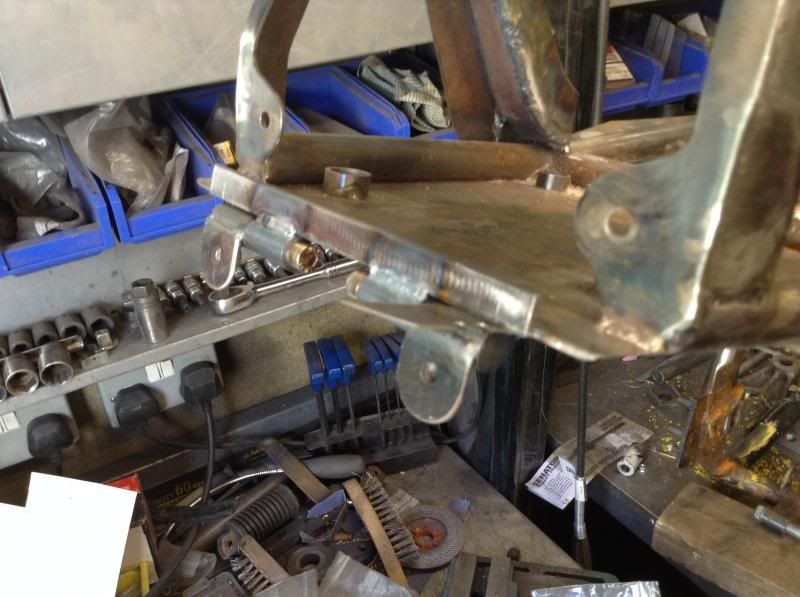 Captive nuts on the back but of course could also use the sticky pads on the two tabs instead of fasteners. 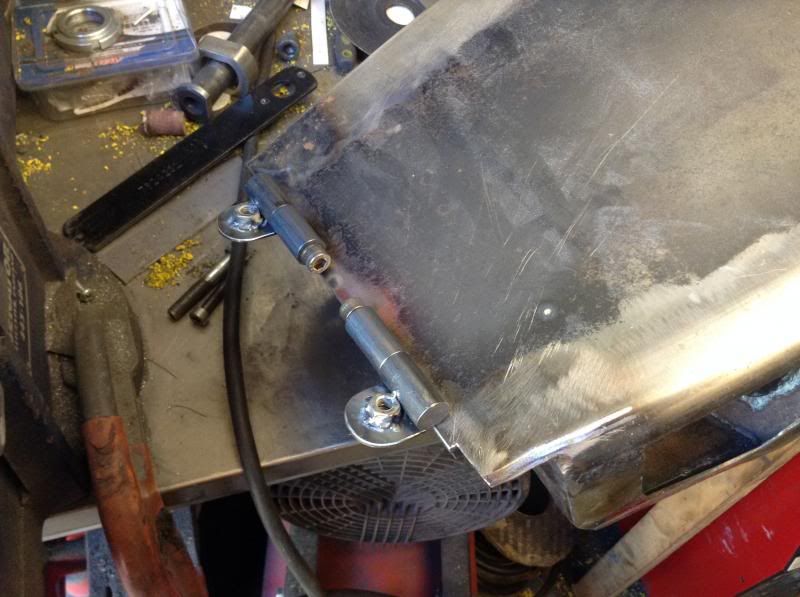 As always took too long to make but looks cool with the bodywork on, ipad decided it did not like the sun so shite pic.  Just used some tape to hold the plate in place for a quick pic.  Seem to remember this was a legal pressed plate with the sizes & font used, which is why I got it, mot's etc. I'm standing lower than the bike here which does make it look higher at the back. 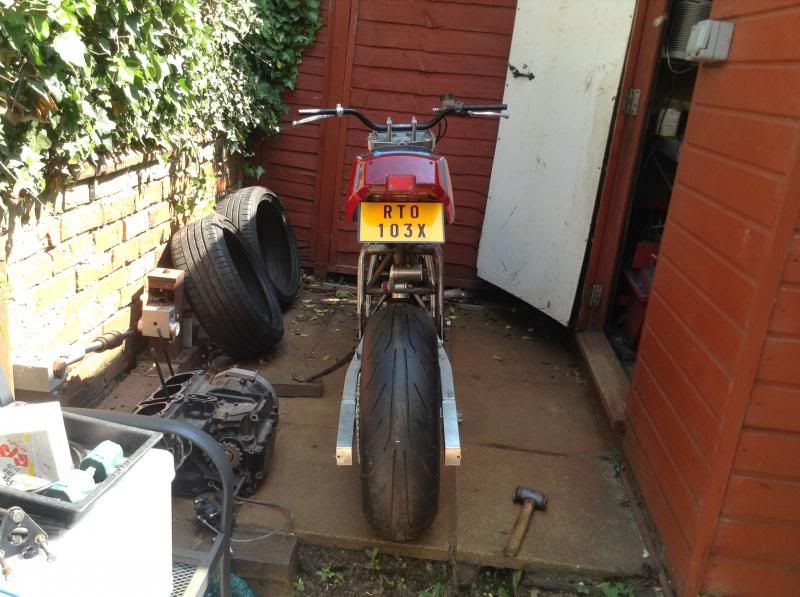 Frame looking a lot better with most of the powder coat removed. 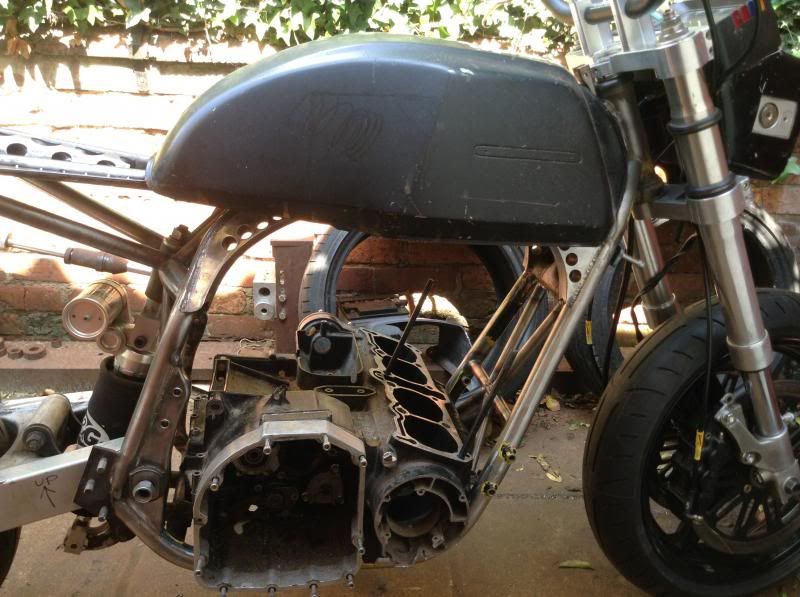 The GSXR1100w.. speedo cable fits, got a nice loop to match the brake cable on that side. Built it up so I can spec & make some alloy parts tomorrow, torque arm tab for the swingarm, modification to the right Harris rearset to mount the AP Racing rear master & the small plate to mount the Dyna 2000 to. Left to do on the frame : Lockstops (a good morning as have to do the stops on the frame & make a stopper to mount on the yolk). Drill two holes to mount two more Kriega luggage haul loops, these will be just in front of the number plate. Two earthing strap points, one near the battery, the other near the back of the engine, tab for indicator relay (using Oberon bar ends). Had a quick look at the lower engine mounts, not going to do major surgery, running out of time so may just leave. Tues = alloy fab, remove anodising from swingarm & drop parts at alloy welders. This Sat 24th taking bike to Kempton Park show so want to have frame finished, engine fitted & front & rear ends in properly by then. Got Friday off work which will help as can spend the whole day on this instead of just a few hours in the morning. Sunday / Bank Holiday Monday will be wiring, I don't have to leave home until midday to ride up for the ferry next Weds so I could get an mot in the morning which then gives me the whole of Tuesday to build as well.
|
|
|
|
Post by b12rock on May 19, 2014 20:58:13 GMT
Keep up the good work. hope you enjoy the island.
|
|
|
|
Post by gammaboy on May 19, 2014 22:45:51 GMT
Epic thrash build. Love it.
|
|
|
|
Post by strangewayz on May 20, 2014 19:07:33 GMT
8This morning needed some of this, maybe I should ask for sponsorship smiley-shocked003 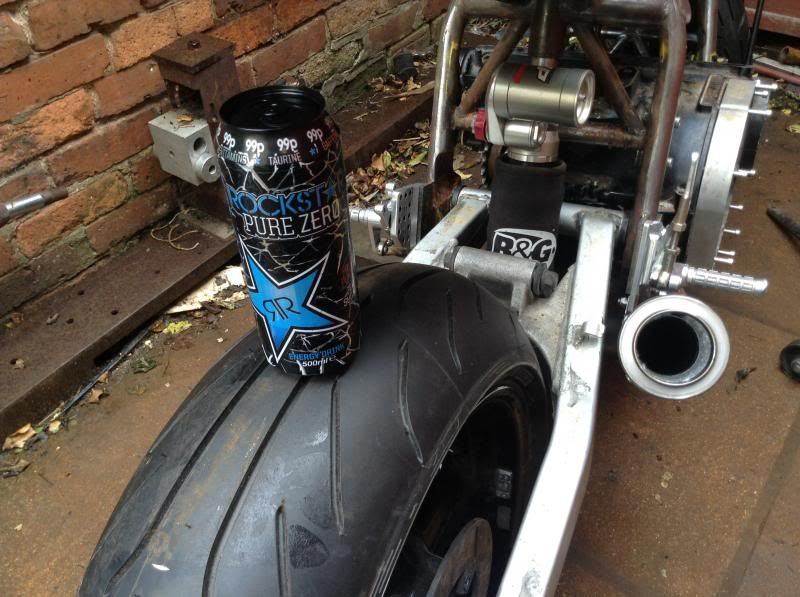 Woke up with a head full of things to design / spec & of course took longer than I hoped, didn't make it to the alloy welders today but he's cool with me dropping stuff with him tomorrow (Weds) & getting the work done for me to be able to collect Friday morning latest. I had a fun morning, still smiling & that's the important thing, very easy to loose sight of that when doing these projects, these are awesome bikes, an escape from the more serious things in life & if you can't enjoy yourself playing with some cool shite then you're doing the wrong thing. First time I had tried to hook the Harris rearset up the engine, these are not for an EFE or ET but using what I think is an EFE rod off the gear change spline & attaching it to the Harris rearset extension it would work. Looks crap & I need to do a one piece rod but this helps me find the correct length & is a Plan B if I run out of time. 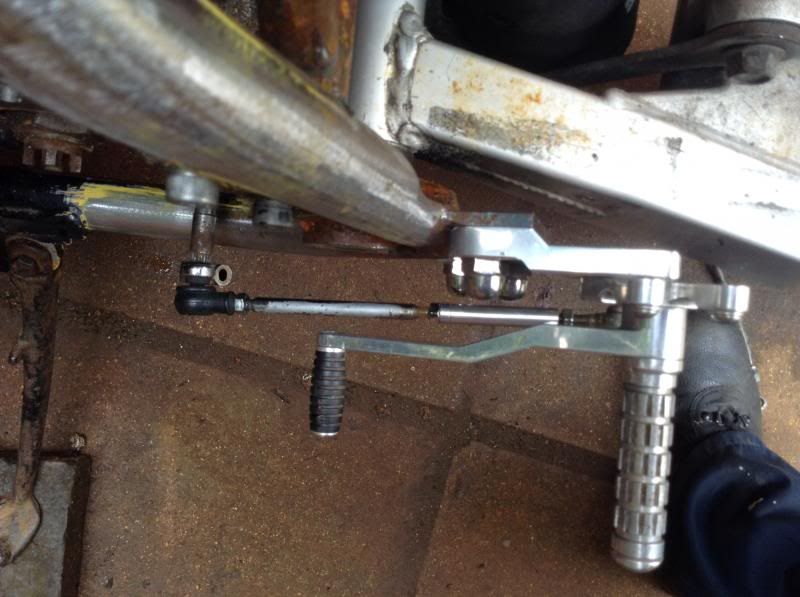 Got into looking at the length that the torque arm needed to be (which will be running brake fluid actually in it), where I was going to mount it on the swingarm & where to put the inlet / outlet stubs for the banjos that was not too close to the exhaust link pipe. 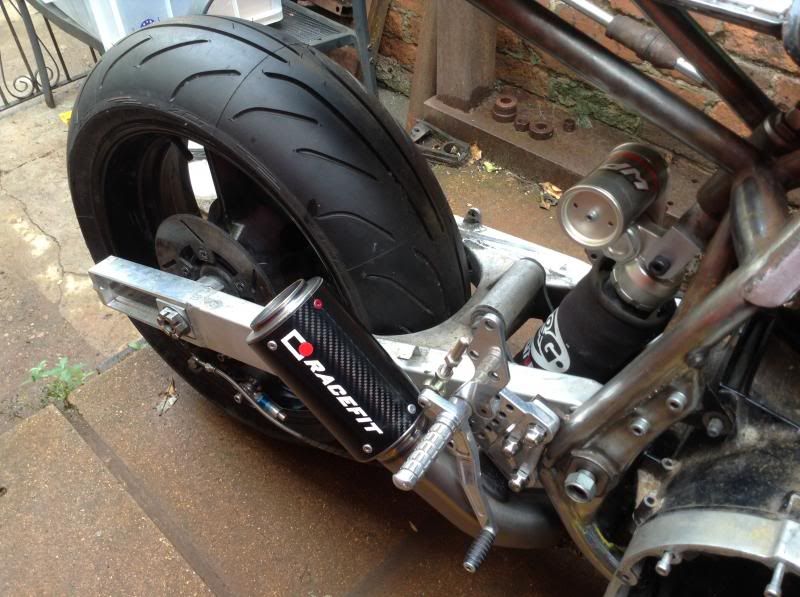 Facing off the end of the torque arm alloy tube. 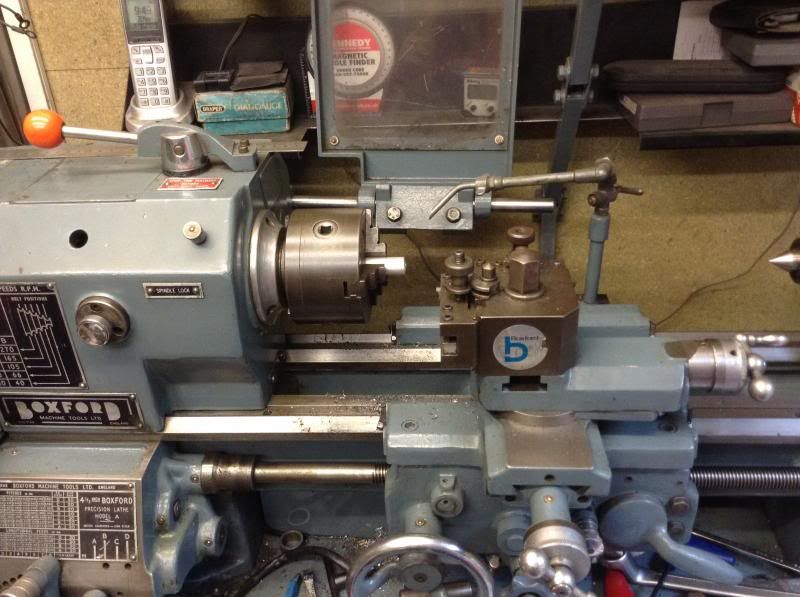 Bit like this, was looking at how much of the extension slot I could use from just one locating mount for the torque arm on the swingarm, so in this pic the caliper is angled as far back as it will go & the rod ends are screwed in.  There is a whole lot of theory about attaching torque arms to the swingarm or the frame, in this case I have a Hayabusa caliper & caliper hanger which was designed to work with a torque arm mounted on the swingarm so that's what I'm doing with this setup. The way to think about it is that if the torque arm attaches to the swingarm the caliper hanger is not intended to move or rotate when the swingarm angle changes because the attachment point for the torque arm on the swingarm pivots with the swingarm ! If the torque arm is anchored to the frame then the caliper hanger is required to move as the swingarm angle changes. That understood you can see that if the brake caliper is in use & clamping the disc, with the caliper attached to the frame via the torque arm there are potentially additional forces being applied to the suspension if the swingarm angle changes. I have a very basic understanding of this & the overall design of where the caliper is mounted & attachment points of the torque arm (where mounted to the frame) alter what these forces do, anti squat etc. It's maybe quite telling that most if not all modern sportsbikes simply mount the torque on the swingarm & do not try to make use of any benefits of a frame mount. In the case of my 711 the temptation was to mount the torque arm on the frame for an oldskool look but I did not want to make the Hayabusa caliper mount that was designed to be clamped in place (& not move) be required to move. Hope that made some sense ! Lastly Ozzy remembered he was a dog & barked when the postie knocked the door.... Yes I am being a tart with this lot... 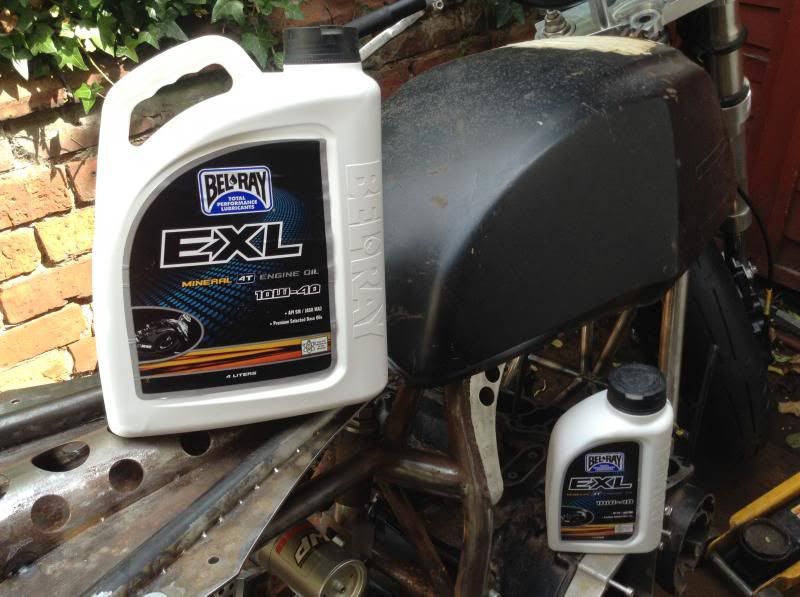
|
|
|
|
Post by gammaboy on May 21, 2014 1:03:34 GMT
Hey Bloke, the replacement for that rear master is no good for me - what's the part number on yours so I can keep an eye out for one s/h?
|
|


 )))))))


 ninja skills


