|
|
Post by fatblokeonbandit on May 27, 2015 5:14:11 GMT
B6GGER ME THATS REALLY REALLY SHINEY  |
|
|
|
Post by 370steve on May 27, 2015 16:35:49 GMT
final push for the end, fitted the dash mount after removing the plastic coat, gave it a rub down with scotch brite for the brushed look. also now looks much better being inline with the h/lamp brackets 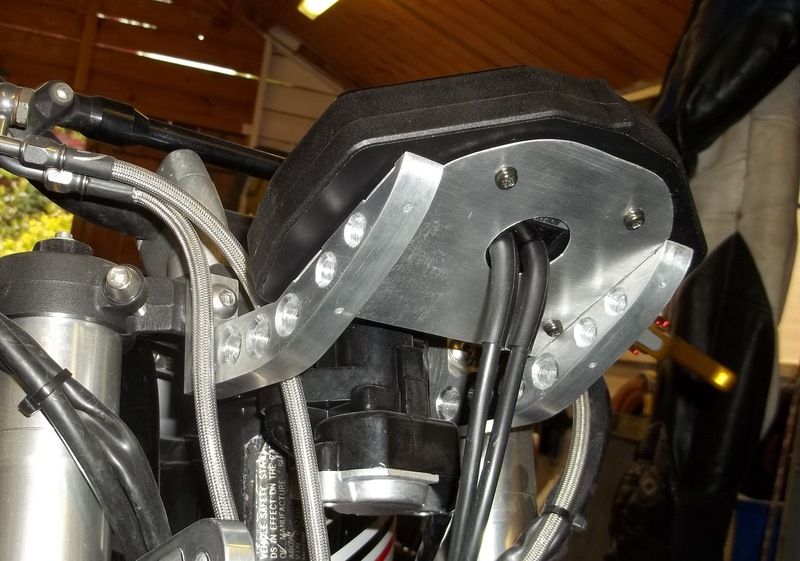 then set about fitting the LED indicators, once they were on and wired in i re fitted the h/lamp, checked it all worked and took some more pics. going to sort the rear indicators, re fit the tail piece and connect the fuel later tonight. 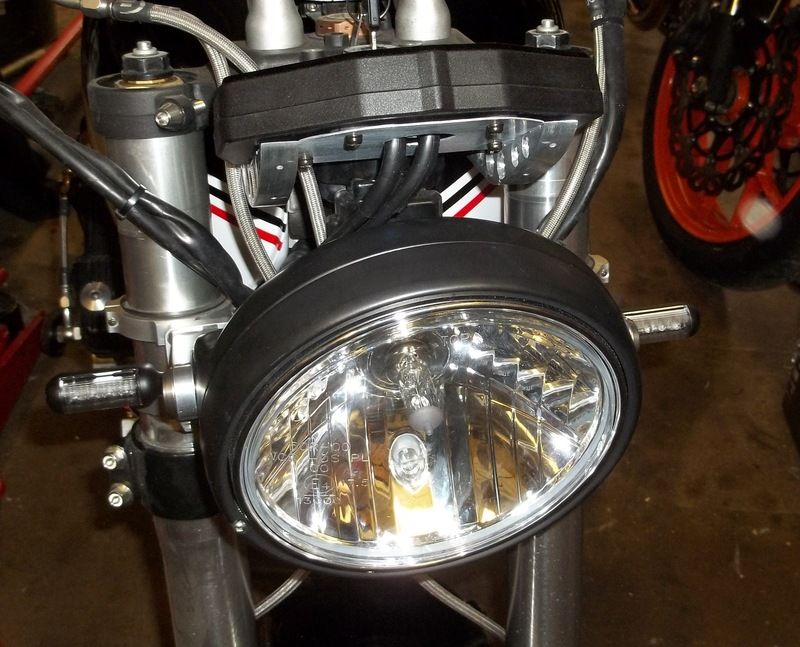 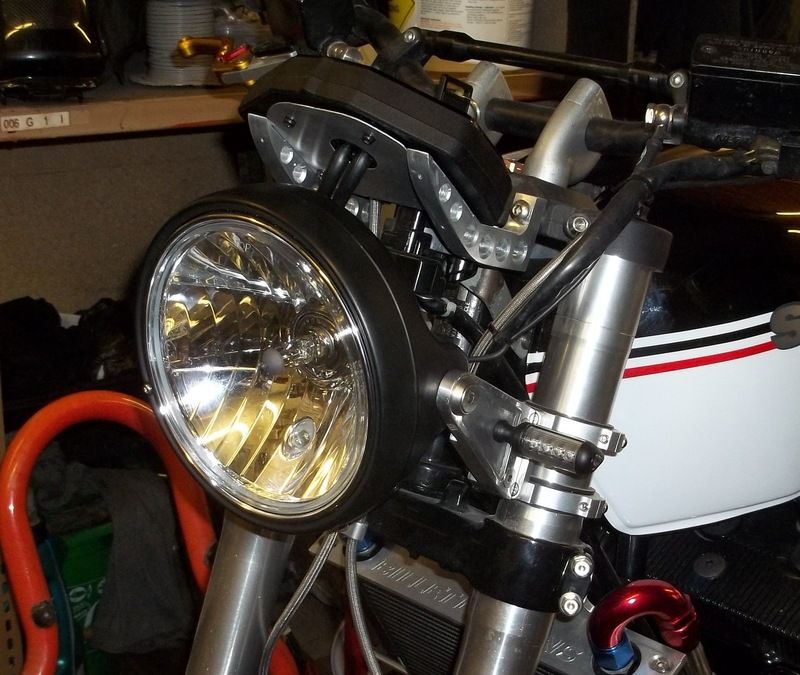 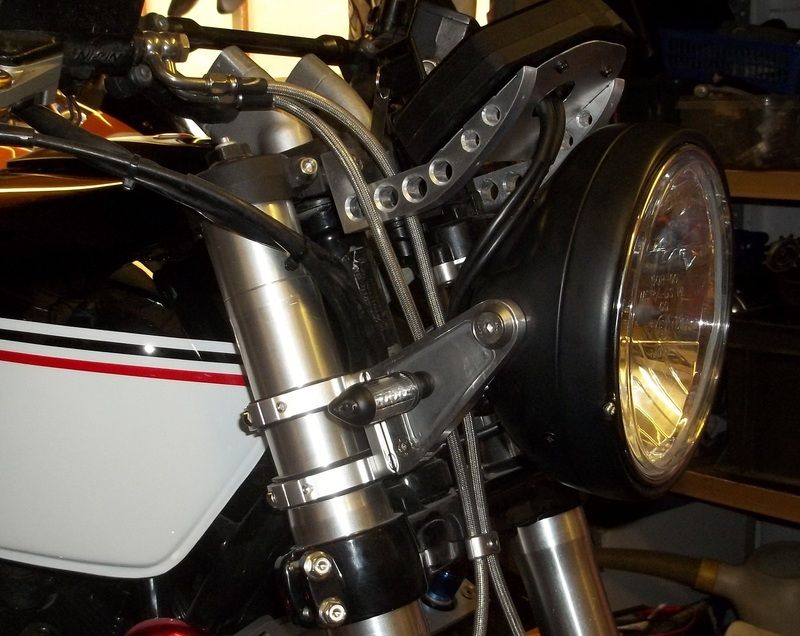 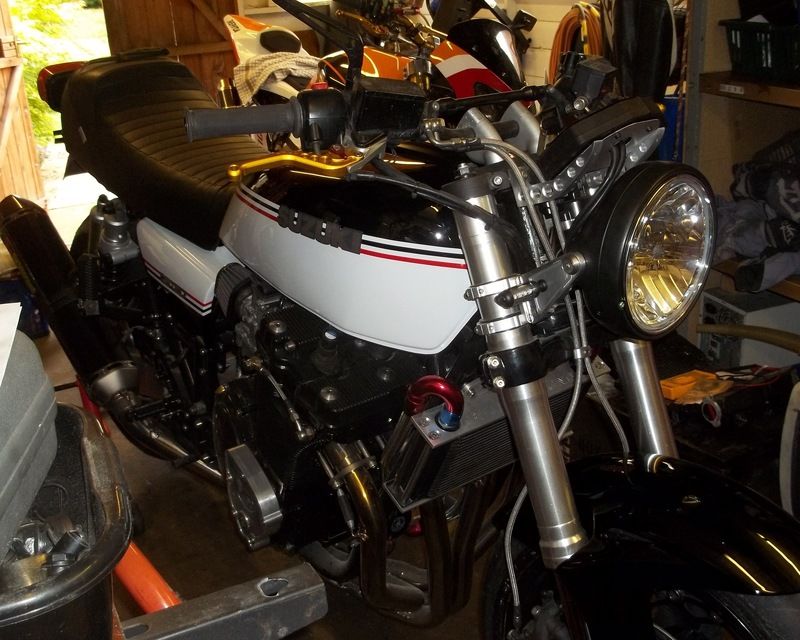 |
|
|
|
Post by captain chaos on May 27, 2015 17:40:29 GMT
why aint the pics not loading?
|
|
|
|
Post by gsx on May 27, 2015 17:50:08 GMT
why aint the pics not loading? Must be your man bag laptop captain |
|
|
|
Post by captain chaos on May 27, 2015 18:35:43 GMT
now they are loading.
|
|
|
|
Post by zooma on May 27, 2015 18:54:35 GMT
Think a "virtual" pint's in order for all the hard work that's gone into this build... here ya go Steve  |
|
|
|
Post by clivegto on May 27, 2015 20:59:54 GMT
Hi Steve great build. How did you widen the frame at swinging arm point ? Who did you use for the plastic coating ? |
|
|
|
Post by 370steve on May 27, 2015 23:13:23 GMT
Hi Steve great build. How did you widen the frame at swinging arm point ? Who did you use for the plastic coating ? I used a hydraulic jack to spread the frame, only needed to spread it around 1cm. all my powder coating is done by RNR coatings of west tanfield near Ripon |
|
|
|
Post by 370steve on May 28, 2015 7:52:10 GMT
didnt manage to get the rear indicators fitted as i need to get/make a mounting bracket for them, but as i have no idea of how large the registration plate will be i am looking at
1) make temp brackets
2) get an adjustable mount from the bike store
3) not bother for now!
more i think about it, and for completions sake, i think i will go with option 2
that way it is done and dusted.
as i didnt finish the rear end, i sorted the fuel feed from the tank to carbs instead, have now got it all sealed and bolted in place with fuel hose fitted, will try some fuel in the tank tonight to make sure there are no leaks.
|
|
|
|
Post by bluedog59 on May 28, 2015 14:26:20 GMT
A very nice build you've done there, I be very happy if that was mine.
One very small point. I look at putting a grommet in the hole on the clock mount that the wiring goes through before you get any chaffing problems.
|
|
|
|
Post by 370steve on May 28, 2015 19:55:07 GMT
cheers for that bluedog, the dash wires are no where near the edge of the hole they come through, and they are fixed into the dash and cant move, so i see no future problems mate, but thanks for the heads up anyway  |
|
|
|
Post by 370steve on May 28, 2015 20:43:11 GMT
went out today and found an R&G tail tidy that with a little bit of adapting fitted rather well, cleaned up the rear end nicely.  fitted the indicators, got them working and re fitted the tail and seat. took her outside in the setting sun to get some pics, light wasnt very good, i will get some more when the light is better.      |
|
|
|
Post by rusty on May 28, 2015 20:52:32 GMT
Mate if thats how it looks with bad photos then I can't wait to see how it looks when you take better pics:-D
|
|
|
|
Post by zooma on May 28, 2015 21:50:54 GMT
I'm lookin' forward to a vid, where we can see that bad girl runnin'... oh and watch her owner laughin' like a lunatic as he realises just what he's created  vid vid |
|
gixxerfreak
Velociraptor

Posts: 33  Bikes: Gsxr1100g Gsxr1100wp Gsxr750 slingy Zx9r Zx9r fighter Xr600r
|
Post by gixxerfreak on May 29, 2015 5:43:36 GMT
Sweet as fook mate |
|


