|
|
Post by strangewayz on May 26, 2014 23:48:48 GMT
2 (Monday) 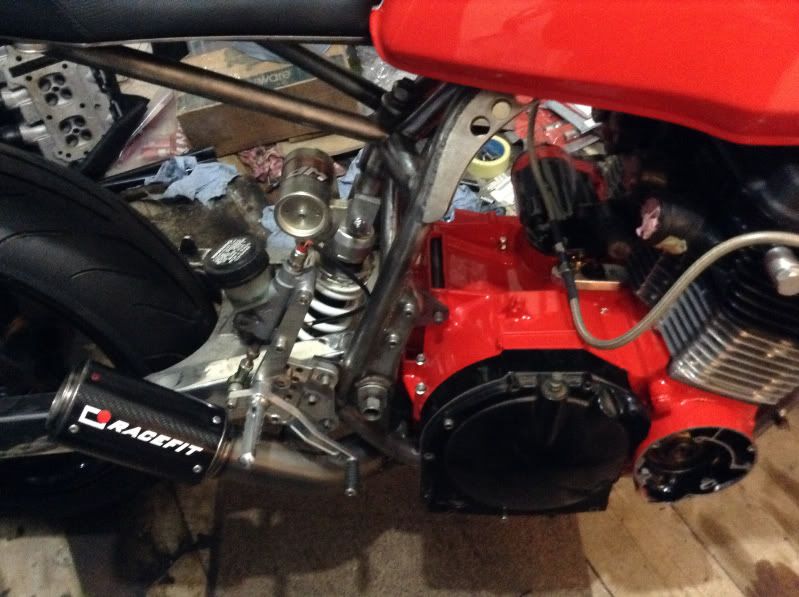 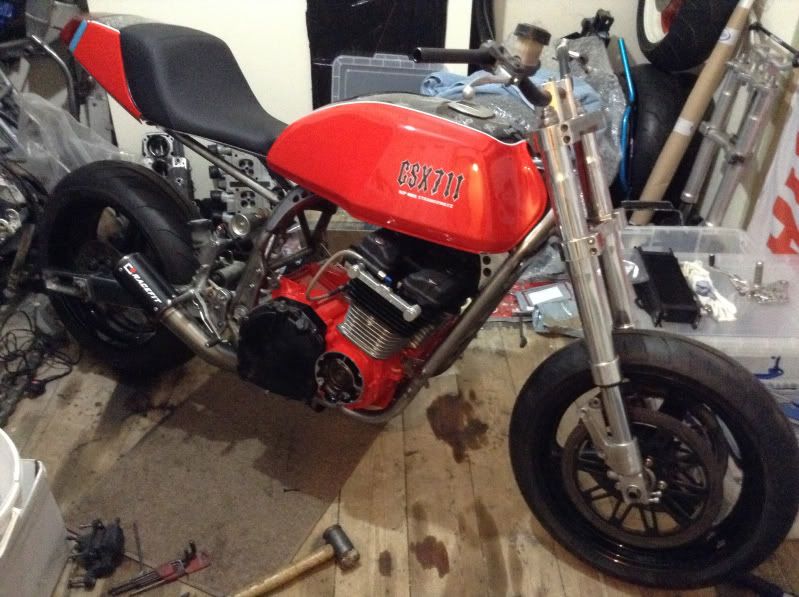
|
|
|
|
Post by gray7/11 on May 27, 2014 0:25:02 GMT
Fuck yeah!!!
|
|
|
|
Post by panda on May 27, 2014 5:09:42 GMT
as usual mr strangewayz with your skills looks stunning, keep up the good work almost there  |
|
|
|
Post by fatblokeonbandit on May 27, 2014 11:48:43 GMT
2 (Monday) Bugger me thats shiney shipmate........ |
|
|
|
Post by danny4646 on May 27, 2014 12:25:07 GMT
Coming on now ain't she! Looking promising for its maiden voyage!!!!
|
|
|
|
Post by strangewayz on May 28, 2014 0:50:44 GMT
Thanks for all your comments  1 1 (Tuesday) Yesterday had been a bit of a mad day, my friend Mark was round to help me get get the front end in, the day before we had turned the engine on it's side & lifted the frame over which is a cool easy way to fit the engine but of course the frame is then sitting on the ground.. Got the back end in easy enough but needed extra hands to get the front in, unfortunately Mark was pushed for time as he had a job to go to later so it was a case of get front end in, jack it up at that height & pull the front end back out to finish polishing it... was still polishing at 10pm but got it all back in by the early hours. Left me a lot of final sorting on the chassis, can't believe how many times my lathe got used for things... Welded the front sprocket up.. 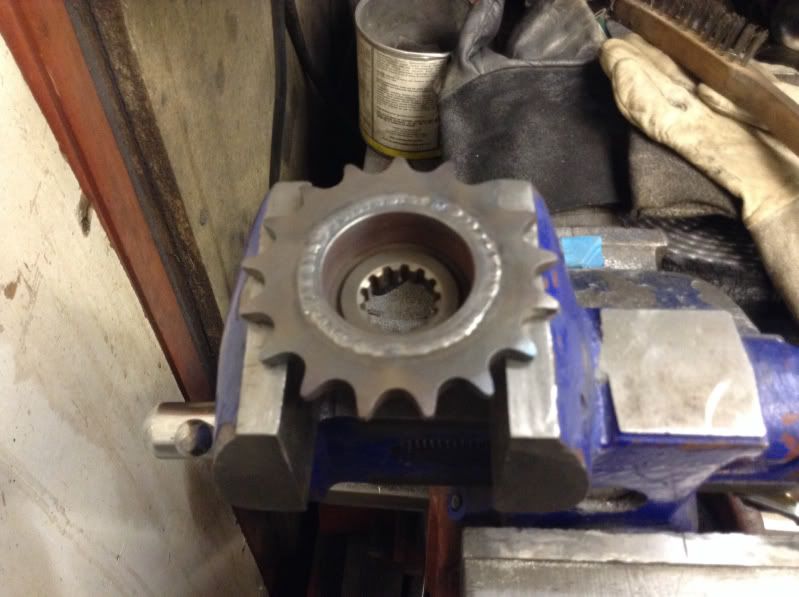 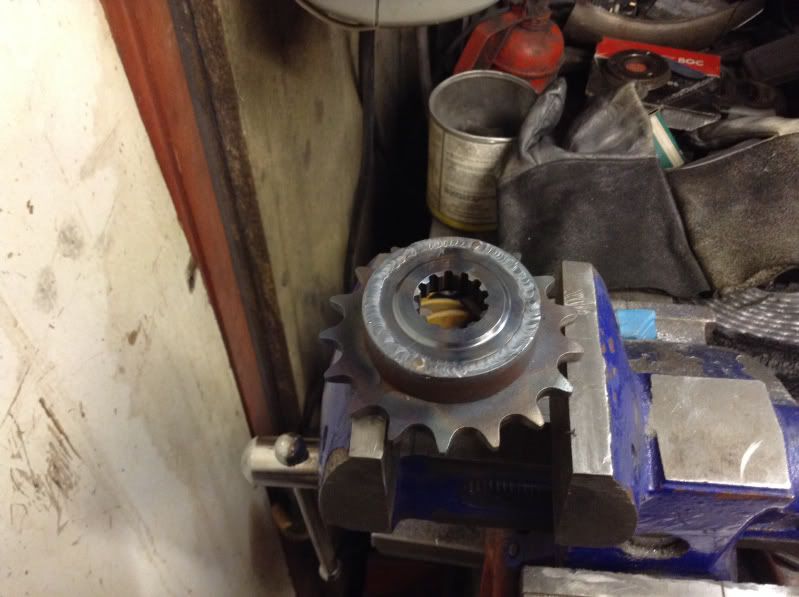 Unable to use the tab washer with this so am going to use two nuts, here you can see a stock nut & one which I have removed the top off so that the second nut has more room on the shaft & has a good flat surface to mate up against the first. The nut which is stock I will turn to thin it out as the second lock nut. 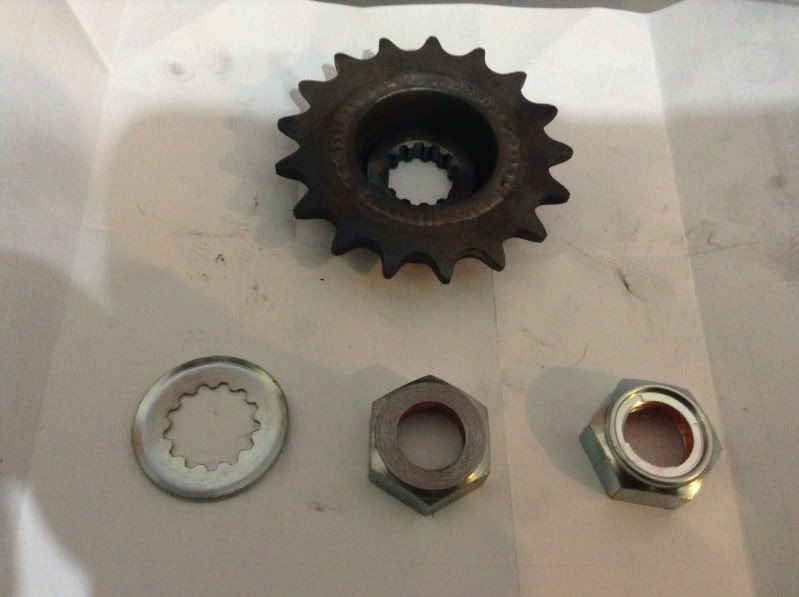 First nut on, you can see how much of the shaft is left for the second nut.  Did a lot of work on the suspension & torqued them all up. 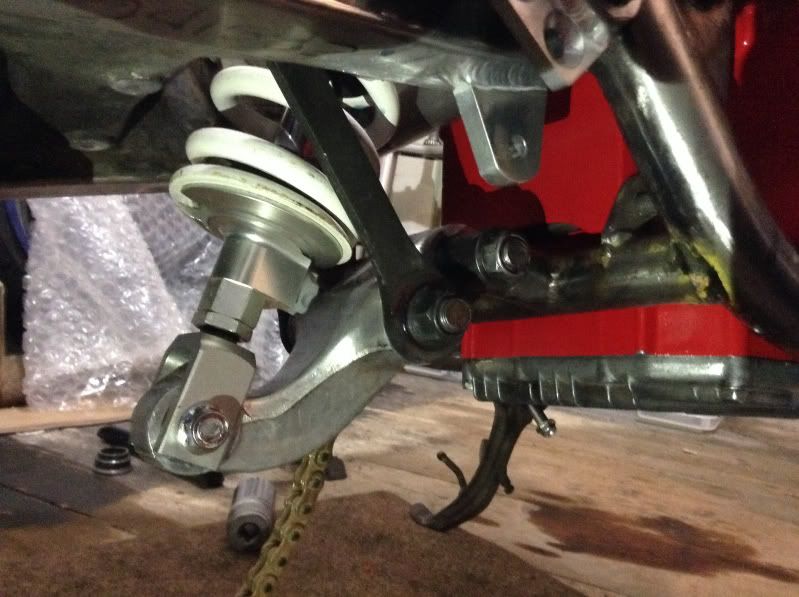 Detail shot of the 5mm drop spindle insert, seems to sit nicely like this although of course the test is how it handles. 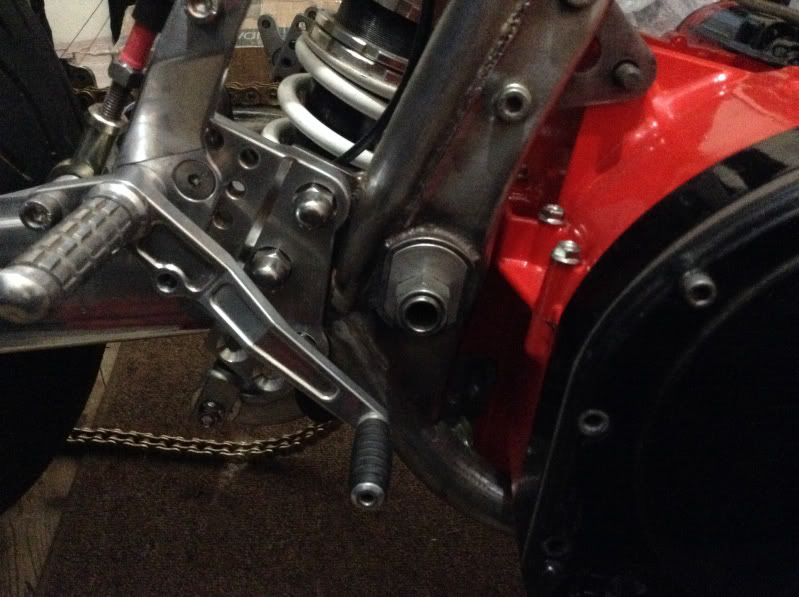 More work on the rear brake MC, just need to trim down the bolt for the pushrod linkage.  Had what I think is a Slabby side stand, the ET side stand was going to need some work as it curled outwards quite a bit & was getting near to interfering with the gear change, the Slabby one is is straighter & also shorter but the bike sits at a nice angle with it. If I use this I will need to adjust it slightly so the sidestand goes a few degrees further forward when down.  Lockwired the sprocket carrier bolts & nuts which was a pig of a job, pics tomorrow when I've got the chain on. Going to sort the chain & adjuster rods out first before fitting the brake calipers / hoses & bleeding them. |
|
|
|
Post by pambos1127 on May 28, 2014 0:58:12 GMT
A lot of work,very nice build.
|
|
candyman
Velociraptor

Posts: 28 
|
Post by candyman on May 28, 2014 11:23:44 GMT
I have to say very nice work. I am really taking notes on your bracing for my own projects, and the welds look beautiful. To weld that sprocket on and get it looking that good is a skill, welding anything on rotating hub and getting it to spin square is a trick! Nice work!
|
|
|
|
Post by busaash on May 28, 2014 21:58:10 GMT
Did you get your mot mate , are you on the island of tt dreams alan ?  |
|
|
|
Post by strangewayz on May 29, 2014 0:09:55 GMT
Zero... (Weds)D Day but no boat for me... Couldn't have worked any harder, been putting in some savage hours, dead on my feet again last night at gone 1am. Finishing the 711 has become more important to me than getting to the TT, I was offered a friends bike last week to take but having put this much work in I can't imagine going without the 711. So far I'm cool, it's rained everyday here since Sunday so all I've missed is testing in the rain, getting an mot in the rain & riding up to the ferry in the rain !! and I've been building a cool bike instead so I'm not having a bad time. Been on the phone to Steam Packet & as & when this gets finished I can ride up & wait around on standby for a boat, they give zero refunds if I cancelled so even if I go sometime next week for a few days that's cool. Two big jobs left which could end in tears trying to get a quick result... 1) Have 30 year old stock EFE wiring loom to make fit... 2) Have RS38's, used that came off a running EFE but I don't know what engine spec. I'd like to be able to go this Sat or even (Mad) Sunday but any big issues with the two things above & my time is just going to slide away. I'll carry on writing this up everyday, done a lot today but all time consuming. With the front sprocket Super Larry had made it so it all pressed together which made it easier to weld, I used a vice on it side to clamp & weld the front in two places 180 degs apart, flipped it & did the same on the back, let it cool & then welded it all up. Finished making the second sprocket lock nut, had to thin it down to 7mm but seemingly it will do the job (two nuts instead of tab washer).  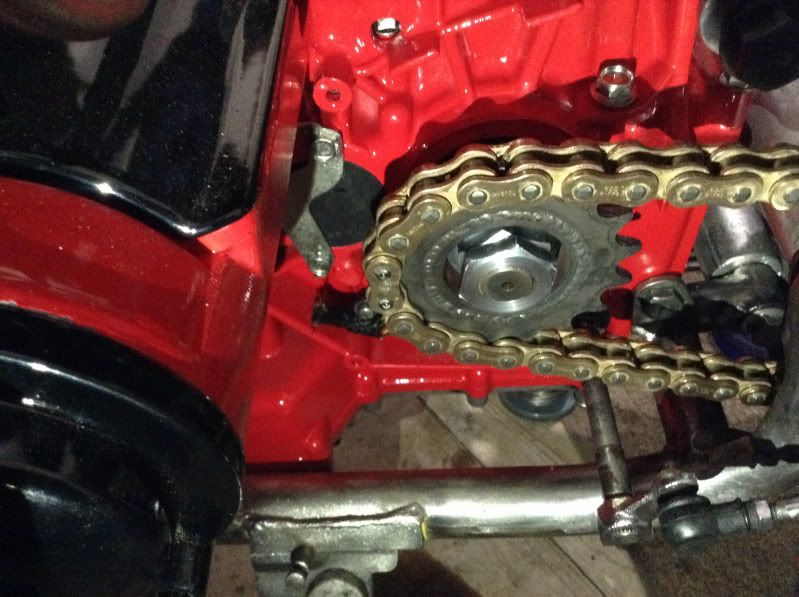 Got the chain on & did all the studding for the spindle block adjusters & lock nights, had some cool stainless pike nuts which I welded onto the ends of the studding... yep within 30 mins I'd stabbed myself in the ankle !! But the wheel was out at the time. 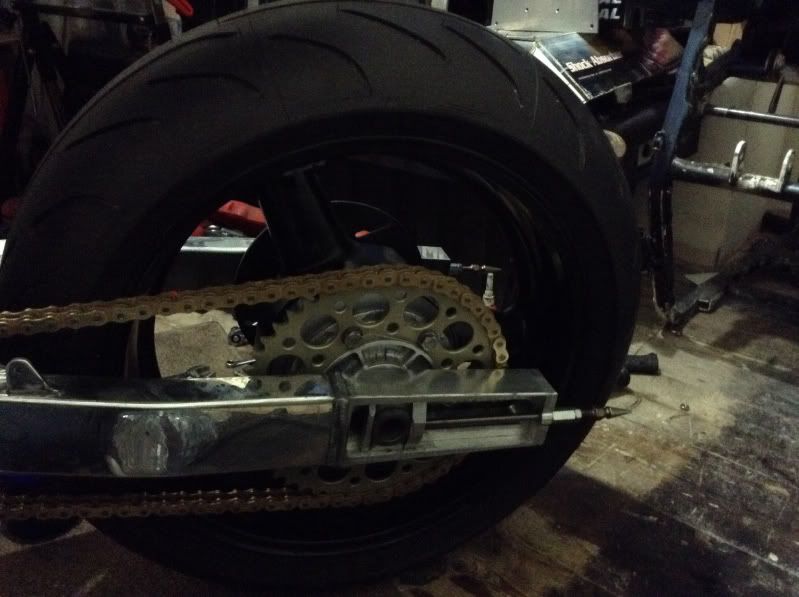 Looks a good chain run / line.  Lots of clearance... this is a GSX750ET frame so same as GSX / Kat / GS1000 @ 226mm internal between the frames swingarm bushes & this is almost fitting in a 190 tyre on a 6" rim without needing chain cutouts using a 520 conversion. Yes I have done chain cut outs but not that much of them is being used. 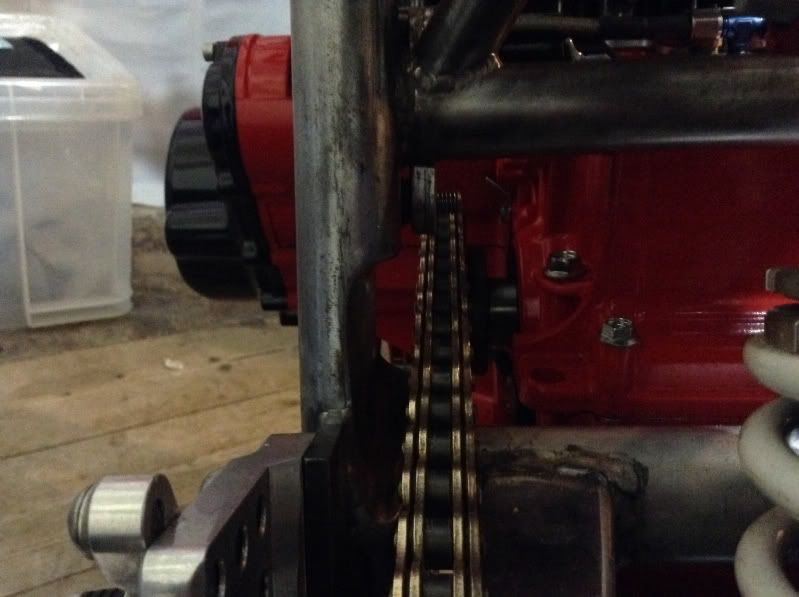 Had to play with the lock nut on the lathe for my adjustable top shock mount, it was an off the shelf stainless nut but would not quite bottom out to lock things up tight so at full shock extension I had some slight play. All sorted now & it works so well for adjusting the ride height quickly. Had it jacked up on a trolley jack to unload the suspension & was messing around winding it up & down setting how far I wanted the chain to sit off the swingarm at the front. The 5mm dropped spindle also seems to make a big difference here in allowing for a greater swingarm angle without the chain wanting to saw through the arm. Made up so brake lines for the hydraulic torque arm, the loop in & out needed to be long enough to work with the rod ends extended, ending up being a tart trying to get the brake lines to have a good route / shape. Not the best pics too much stuff in the build room.   Started to bleed the rear, got the fluid working through the torque arm & into the caliper, stopped on that to change the seals in my AP Racing front master cylinder, well try.... as the piston is currently seized in the bore seemingly all the way in. Got to work out a way to get that out, circlips out but can't get anything on the piston to get it out. Will leave it soaking overnight in penetrating fluid. Worst case AP Racing HQ is 30 miles up the road so I'll go see them tomorrow if need be. So minus numbers it is !!
|
|
|
|
Post by djc on May 29, 2014 0:49:48 GMT
In my most humble opinion, good choice on finishing the bike. An absolutely stunning build (and I thought you couldn't better GrebRod!), it'll be magnificent when you finish!
|
|
|
|
Post by gammaboy on May 29, 2014 5:55:47 GMT
Compressed air will get that master piston out....
Still loving the build.
|
|
|
|
Post by captain chaos on May 29, 2014 6:34:26 GMT
Compressed air will get that master piston out.... yes. Just don't look at the piston while trying to press it out, it will come out with quite some violence. Once I saw someone blowing out pistons from a brake caliper, he tried to hold one with his fingers and press the other out, he has only three fingers now on his left hand. |
|
|
|
Post by busaash on May 29, 2014 7:30:26 GMT
shame your not ready but your still trying so good luck.
if you get over for a few days you will have still achieved your goal alan .
very nice rear tourqe arm idea too  |
|
|
|
Post by strangewayz on May 29, 2014 7:54:42 GMT
Thanks all !
Had a good start to today, at 1am ish last night I'd lost workshop key so couldn't get some kit out !!!
Found it first thing this morning & hey what do you know, soaking in penetrating fluid over night I poured a kettle full of just boiled water over the mc housing & got the piston to move slightly, few more minutes & it was out !
Off to finish bleeding rear brakes, clean front calipers fit & bleed, shorten oil cooler lines & fit, got a powder coated sump casing to out & then fill with oil, starter motor, clutch cable, carbs & filters.... Maybe start looking at the loom later this afternoon / early evening.
Be good to wake up & have all of Friday to lengthen, shorten cables etc... Mot Saturday morning?
Earlier got a text from my friends on the M6 on the way up to get the ferry from Heysham, they were soaked.
|
|