|
|
Post by strangewayz on Apr 23, 2014 13:38:34 GMT
From above Kriega luggage loops... 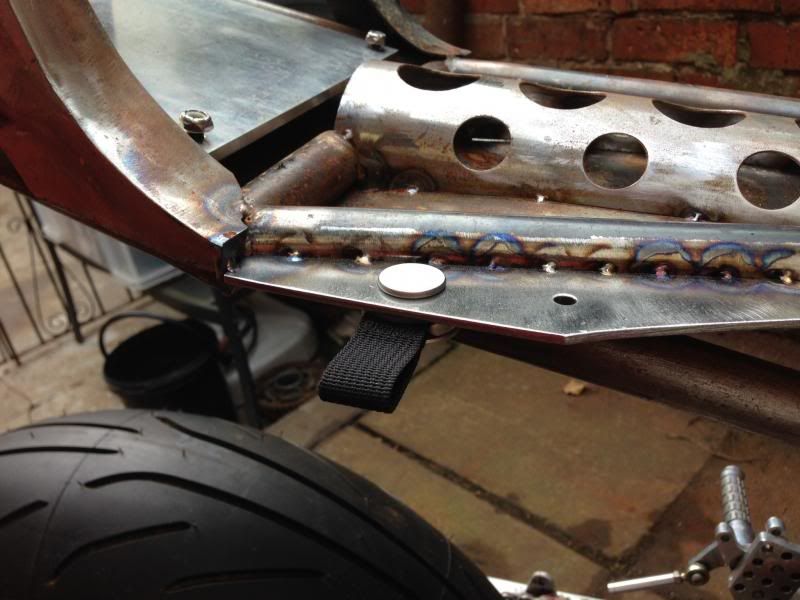 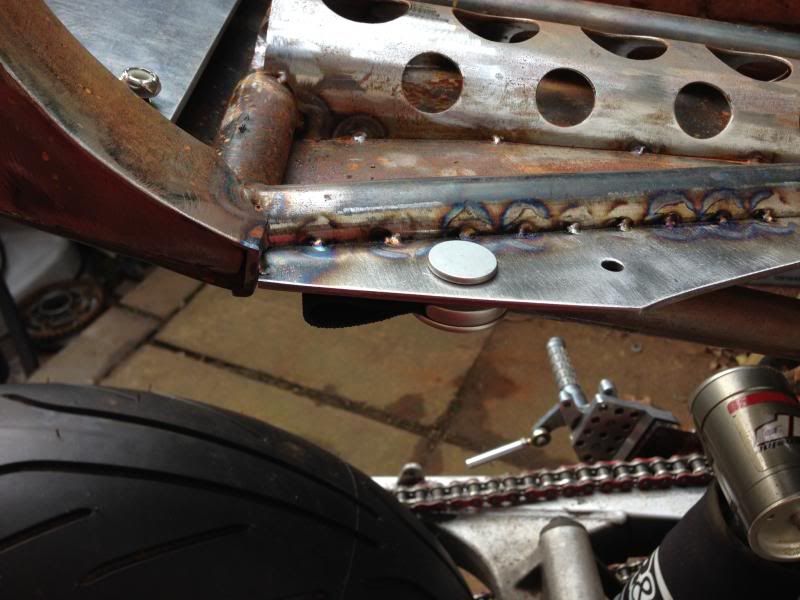 |
|
|
|
Post by strangewayz on Apr 25, 2014 22:02:46 GMT
Needed to make a lip around the tail piece for the seat base to sit on, too prevent sideways movement & I will also use this area to stop water getting down between the tail piece & seat (they will be flush so the seat will not overlap the tail piece...) 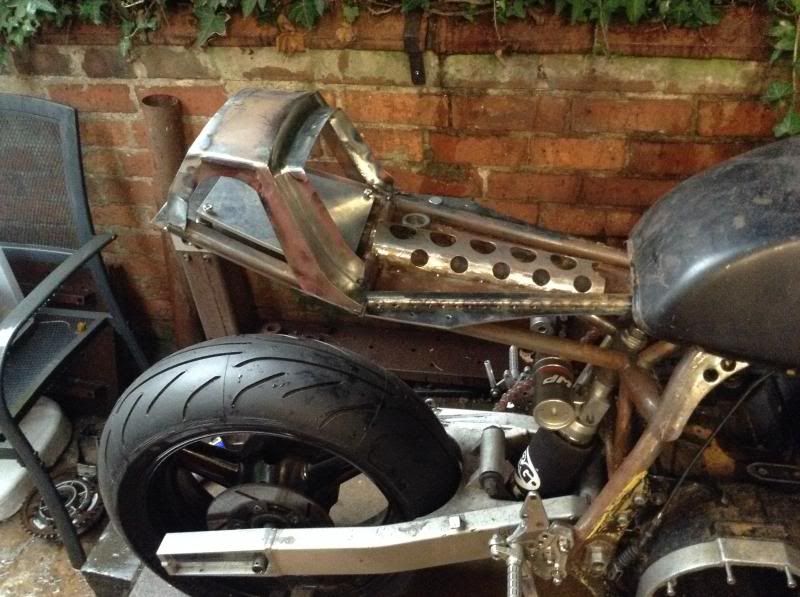 Can see better how it will actually work in this picture. 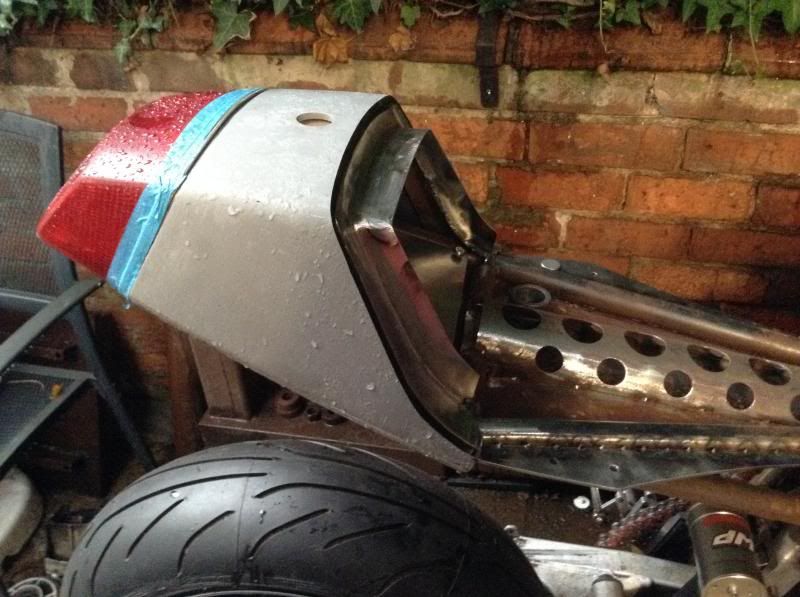 Just got home from Super Larry's with a bucket of machined parts... slimmed down sprocket carrier, different inserts for the adjustable swingarm spindle, few other bits.. |
|
|
|
Post by strangewayz on Apr 26, 2014 21:08:02 GMT
This has got a Slingshot arm in it, think it could be 750M but not 100% sure, when Sam did the extensions for me he didn't know exactly either. It's actually quite narrow trying to squeeze a Busa wheel & carrier in, whilst aiming for central wheel alignment. Needed to start somewhere & whilst I did think more machining would need to be done I had Super Larry take 6mm off the sprocket face on the carrier + modify the sprocket bolts the same. Also did away with the seal that is in front of the bearing & had the lip machined flush (with that bearing). Pics showing unmodifed & modified carriers. 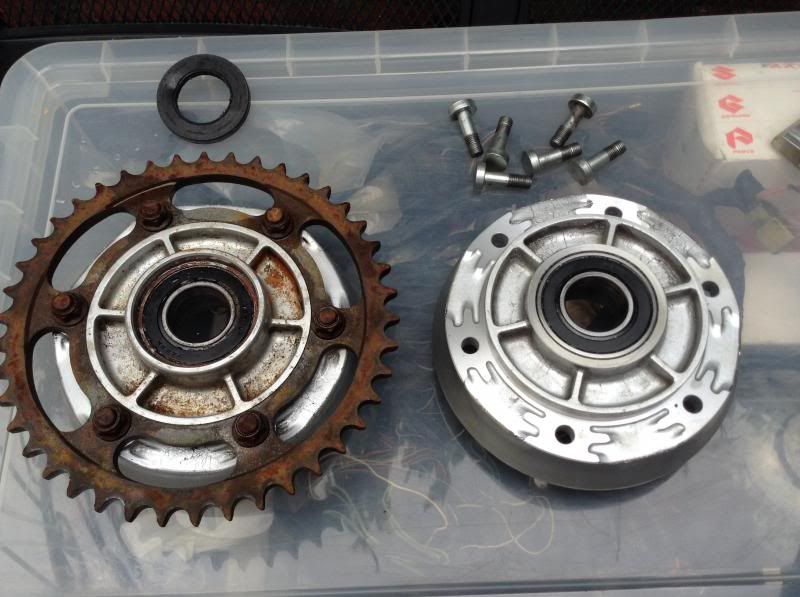 By temporarily removing the outside spacer from the sprocket carrier I knew these mods would let me sit the carrier right up against the arm to be able to measure how big that spacer needed to be. 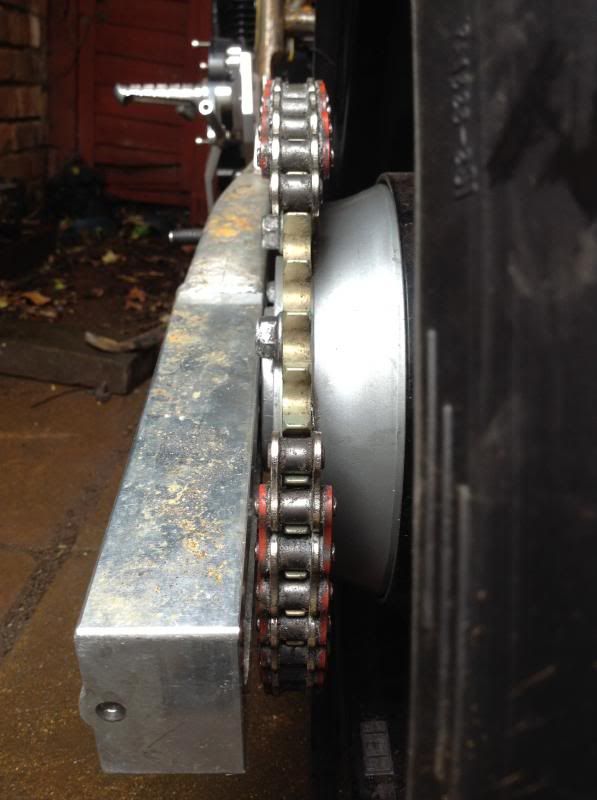 I had done my calculations first & knew the modifications to the carrier would bring things close, like this the wheel only needs to move 1mm to the right to be central. That will of course only give me 1mm clearance between the sprocker carrier & arm so I think I will recess the bearing in the carrier & machine the lip down again to win a bit more room... which means also altering the spacer which goes on the inside between that bearing & the wheel bearing. 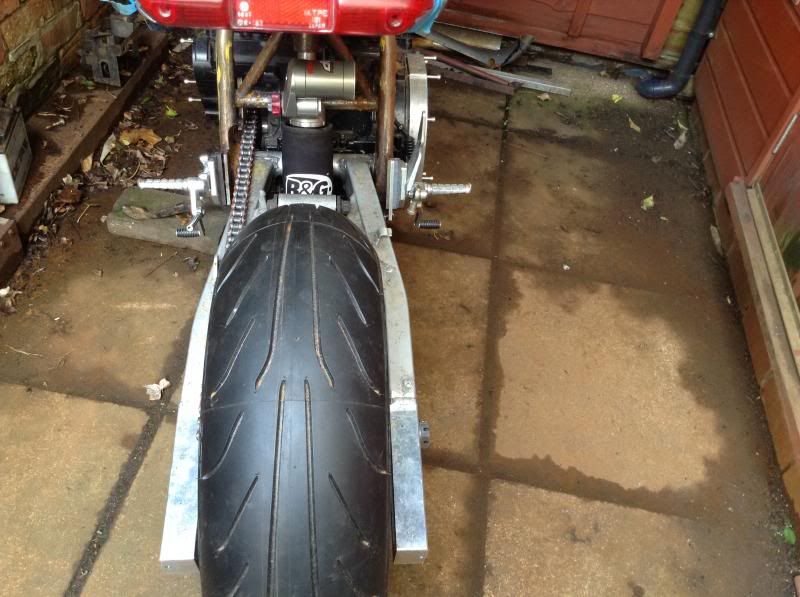 Chain appears to be close to the tyre with a 530 but I need to get a 5/8th offset as the 3/8th is just falling off the splines trying to mock it up. This is just a mock up chain to work out how many links, maybe I need to change chain size. 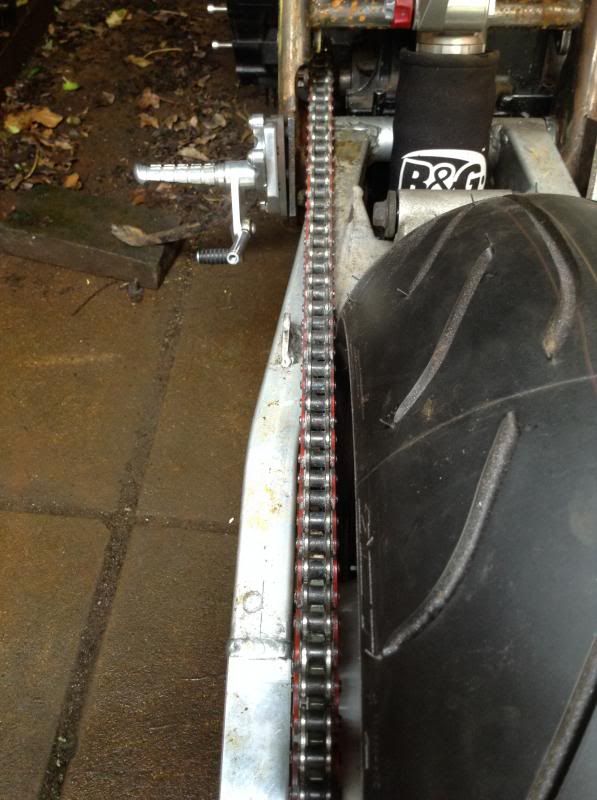 When Sam made the extensions I wanted to use the Busa spindle & chain adjuster blocks, unfortunately ran into a small issue with that... Whilst the spindle is fully supported by the extension it tapers down to a smaller diameter thread where the chain adjuster block fits, making it a loose fit so the wheel is cannot be retained by the block in the correct position. 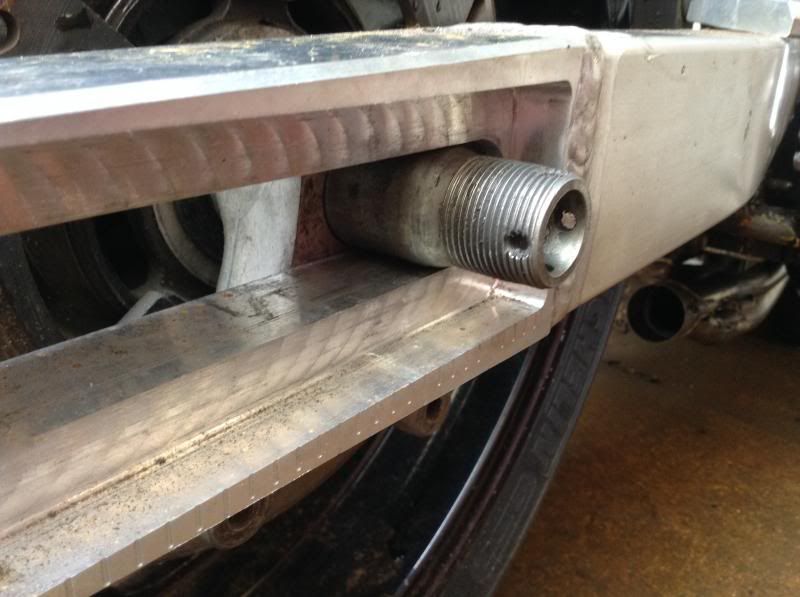 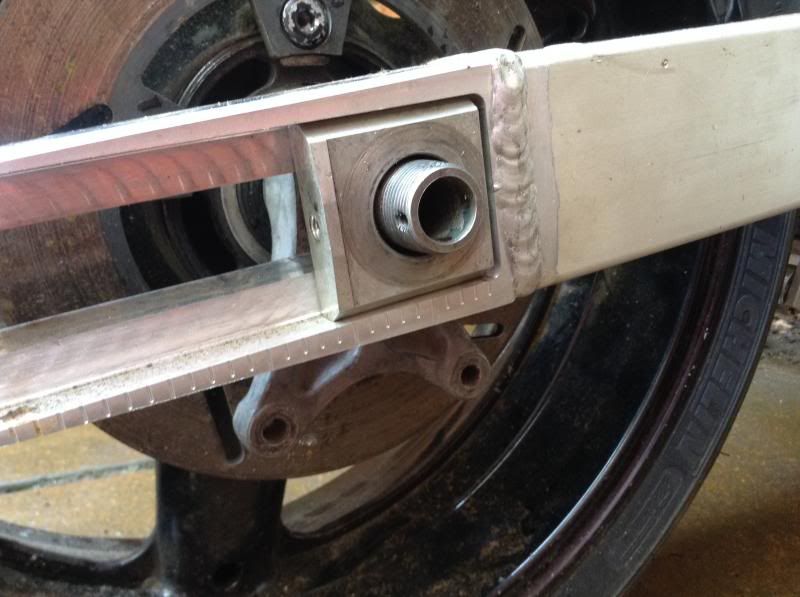 Super Larry made me a new block to match the outside diameter of the threaded section of the spindle, sorted !! 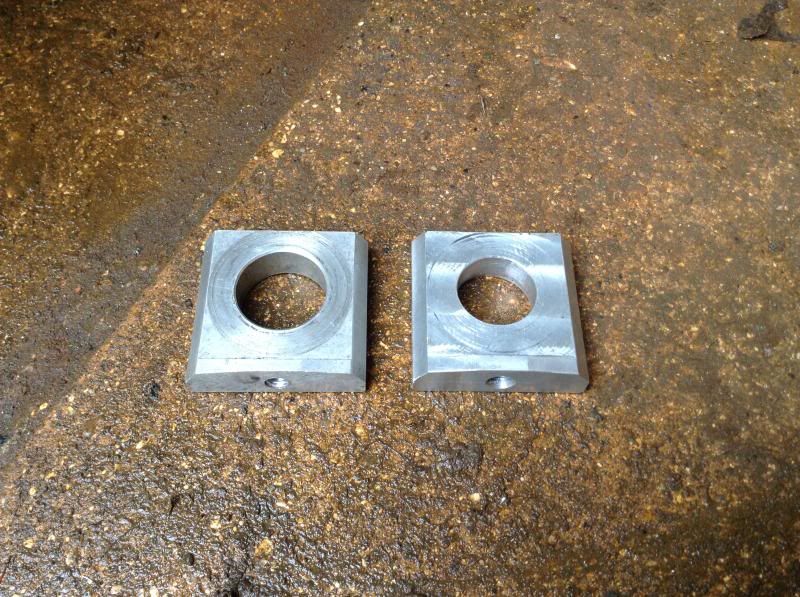 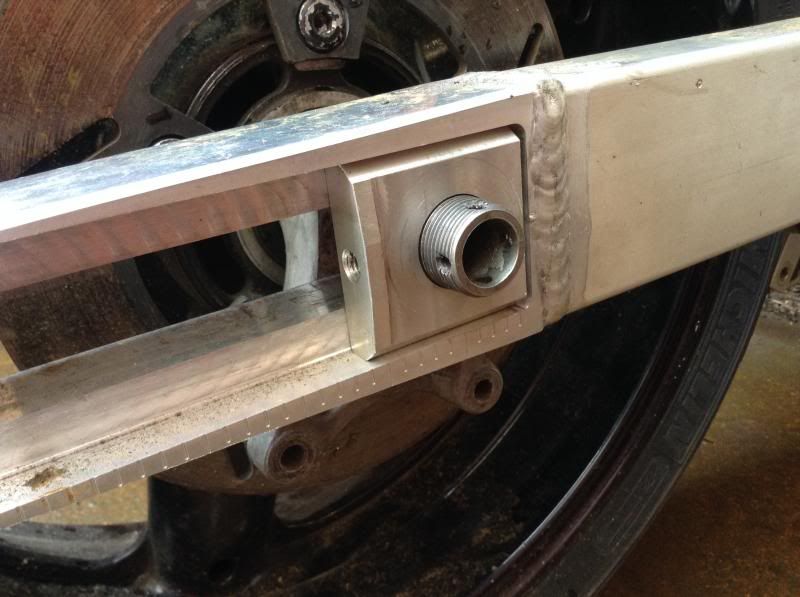 Lastly he turned down the integral washer on the spindle nut, lowered the grooves so that they were in the correct place to drop a pin through & reduced the overall with of it so match the end of the spindle when clamped up. 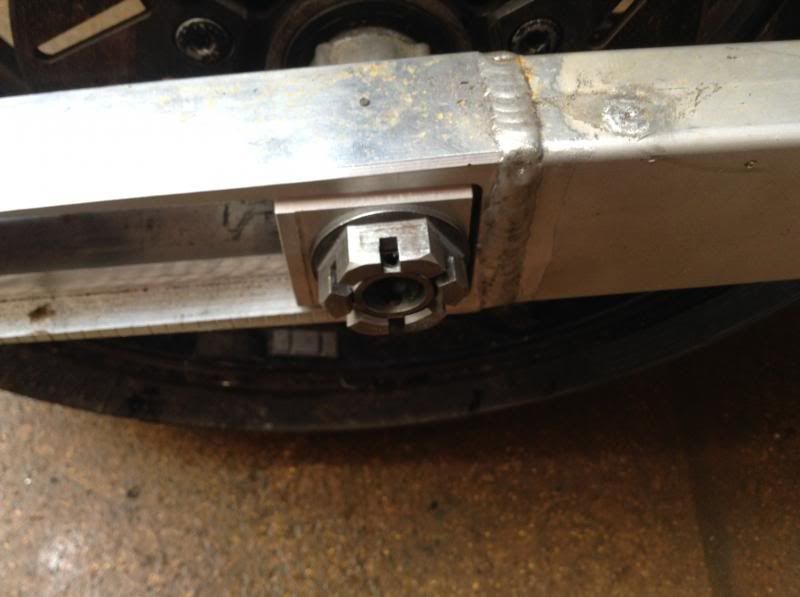 |
|
|
|
Post by strangewayz on Apr 27, 2014 14:12:22 GMT
|
|
fastgs287
Oviraptor
 Still on crutches- need to make a rack to carry them on the SV
Posts: 11 
|
Post by fastgs287 on Apr 28, 2014 15:03:33 GMT
Now I see what you meant when you said you were busy-
It's gonna be a tough challenge to finish it in time for the TT.
I'm sure you can. |
|
|
|
Post by strangewayz on Apr 28, 2014 17:33:35 GMT
Thanks & trying hard, just got to try & move it forward when I have the time to work on it, repeat that enough & it will get done. Keep imagining Ramsey hairpin & then up past the cones making it one way  The machining & parts costs is hitting me a bit hard, to get this to the TT I need to give up on getting everything powder coated, not enough cash left, so I will get the remaining paint off the frame & spray it with ACF50, going bare metal... it will be a good dry build test !! The engines painted as is the bodykit, I'll polish & then scotch brite the swingarm & forks so it will still look super cool  Tarting around prior to laying up the fibreglass for the seat base, used plastercine to form an internal sloped edge where the subframe tube meets the welded in panel, could not leave that as the fibreglass would undercut the frame tube & I would not be able to release the seat base after making it. 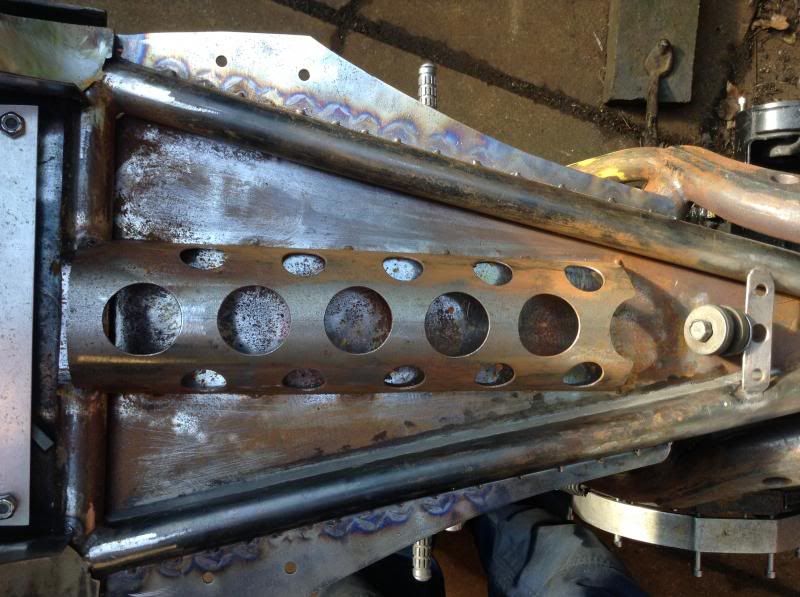 This & that.. 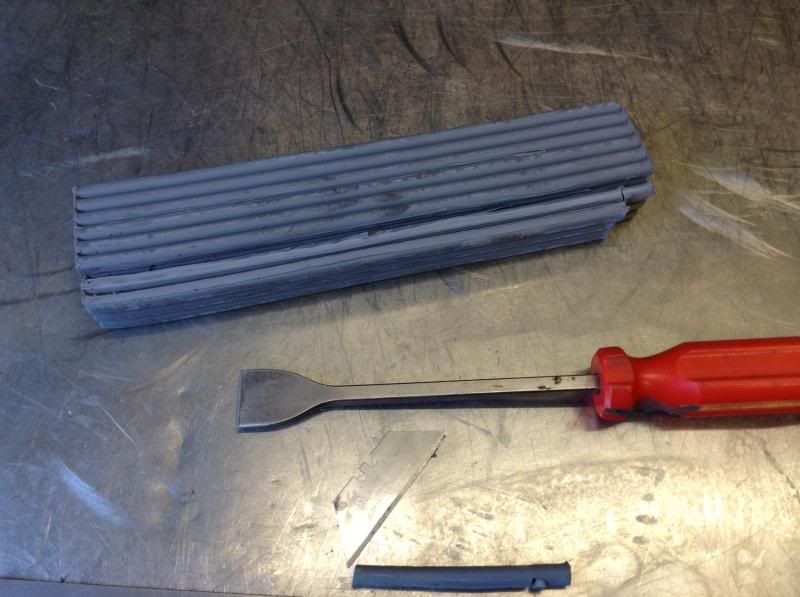 Few seconds to get it a bit warmer. 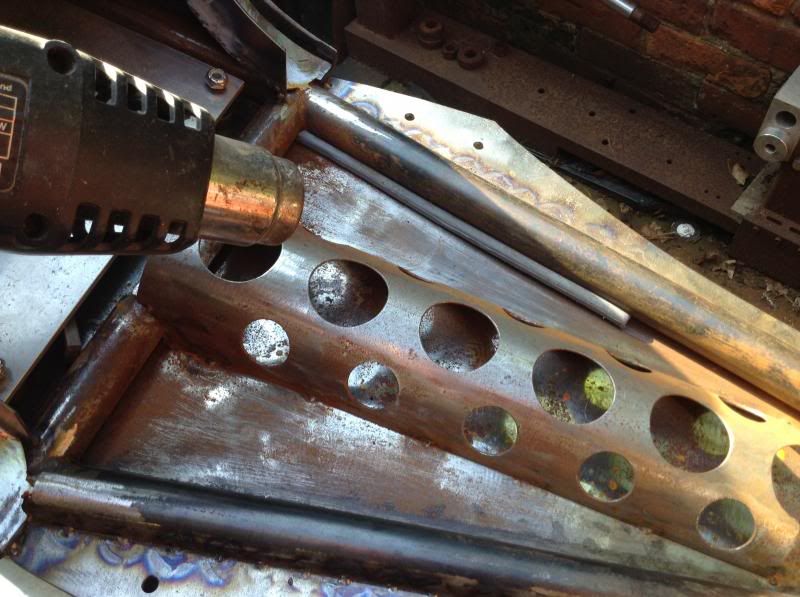 And... there will be no gel coat, this is 'only' a seat base so what I lay down will be what I use, so the edges have to just be fit for purpose & not finished 100% 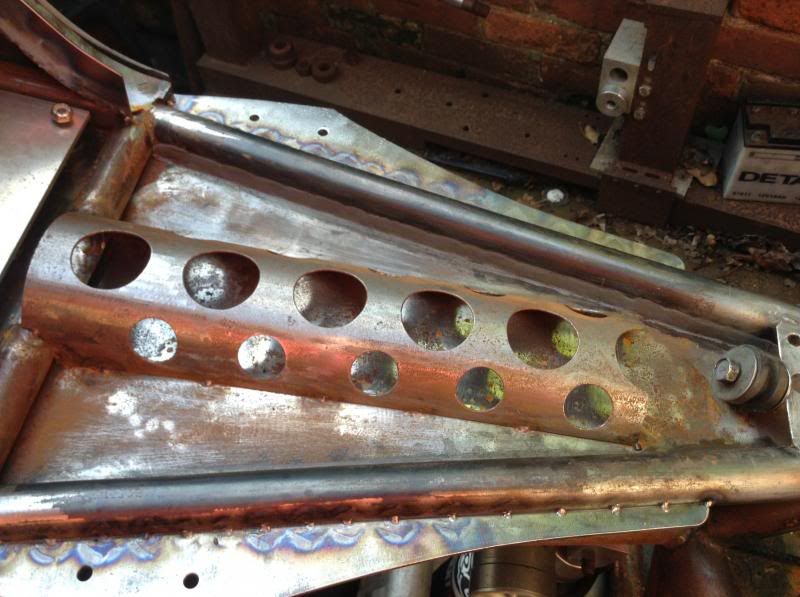 Fast forward & I had added some tape to the cable tunnel to block the holes, taped up the back section & also created an area out of plastercine around the tank mount / front of the cable tunnel. I could only do so much with the cable tunnel out of metal because you needed to be able to get fingers / tools in the undo the tank mount, the underside of the seat base 'adds' the rest of the space for the cables to run through. 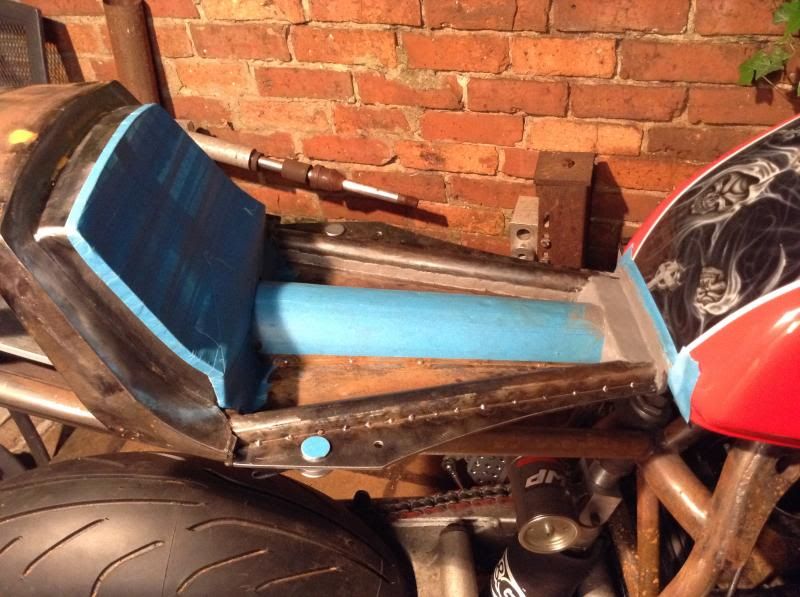 Lastly... nice shape.  |
|
|
|
Post by Pete750ET on Apr 29, 2014 7:30:20 GMT
Great job Alan, awesome project that's really starting to come together now.
Remember following the start of it on the old site and your reason for building the bike
|
|
|
|
Post by busaash on Apr 29, 2014 9:28:59 GMT
wow as always alan , build once build right . good progress you will be at the tt on it for sure  |
|
|
|
Post by homer711 on Apr 29, 2014 16:13:19 GMT
Details... Awesome work! Once again
|
|
|
|
Post by strangewayz on Apr 29, 2014 18:27:45 GMT
Thanks all !!
At Super Larry's again today... this is what happened..
Picked up some parts for a cool torque arm, whilst minimal & hidden seems to be the way to go I've gone in a different direction but engineering wise it's pretty cool.
Dropped off sprocket carrier, spacers & bolts to be adjusted to give me more clearance.
Also rear brake caliper hanger to be shaved.
Spacers to be made to mount AP Racing rear mc to Harris rearsets.
Bracket to be made that I will weld to the frame to 'hold' the tab of the GPR steering damper that is mounted on the yolks.
Got home & ordered up 520 sprockets, going slimmed down, will be using a high spec chain & guess I'll see for myself how much it stretches in use.
Worked out how much longer the front brake hose that runs down to the splitter needs to be on my PFM 6 pot superbike brake kit to work with my Renthal Fatbars, rang PFM & I will send the hoses to them to be altered.
So yeah it's all coming together, just not enough hours in the day seemingly to work on this, full time job + been doing a KH500 with KH750 engine, Triumph single sider, Ducati monster front end for someone else !! He's a cool dude though & is ok with me concentrating on the 711 during May to get it to the TT... or bust ha ha!
|
|
|
|
Post by captain chaos on Apr 29, 2014 19:18:22 GMT
been doing a KH500 with KH750 engine, Triumph single sider, Ducati monster front end pics please? |
|
|
|
Post by strangewayz on May 1, 2014 18:02:15 GMT
been doing a KH500 with KH750 engine, Triumph single sider, Ducati monster front end pics please? I'll maybe take a few pics at weekend it's at the basics stage of getting the arm in with central wheel, chain clearance, fitting the Ducati yolks to KH frame, etc.. Back to 711 & onto seat fibreglassing... When Stevea does the seat he will be folding the material under the seat edges so I put 3 layers of card (measured in total 1.5mm) along all the edges so there will be a gap for that to happen. He also said that he will use 3mm foam under the edge of the fibreglass that touches the tank so to make that gap I used 6 pieces of card. 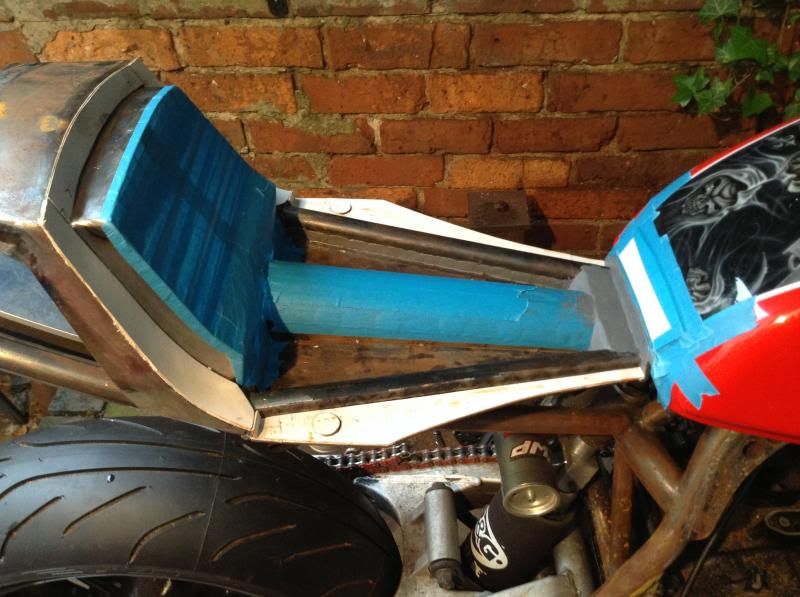 Wrapped in clingfilm. 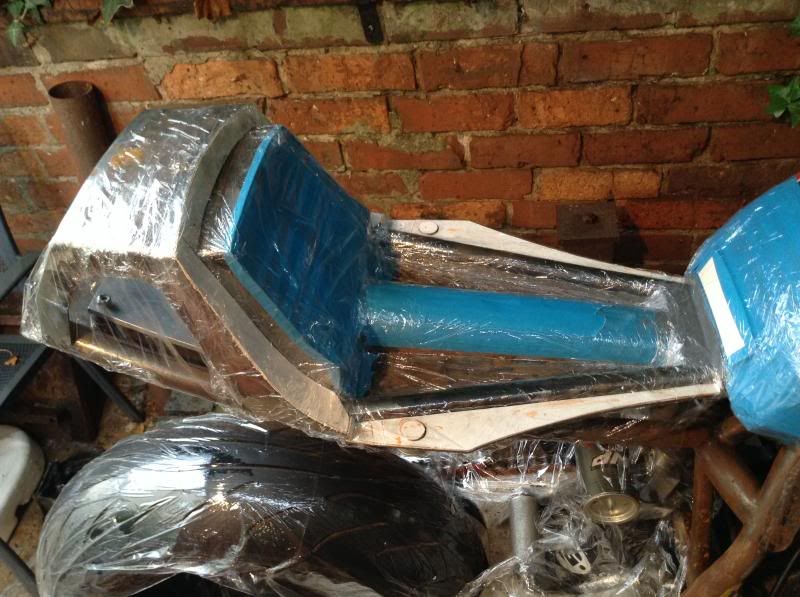 You may not get the next bit but that's ok as it's my bike  Few years back watched a Hotrod programme & they made a custom subwoofer enclosure by stretching a sweatshirt around the speaker rings & laying the fibreglass onto that. In that moment I knew I had to do something similar with one of Mrs Strangewayz old tops.... Around the time she went into the hospice she asked me to get her some of my Strangewayz sweatshirts & wanted one in girlie pink, few weeks back when deciding what top to use for this seat base I thought hey that is also the colour of breast cancer charities so easy choice. 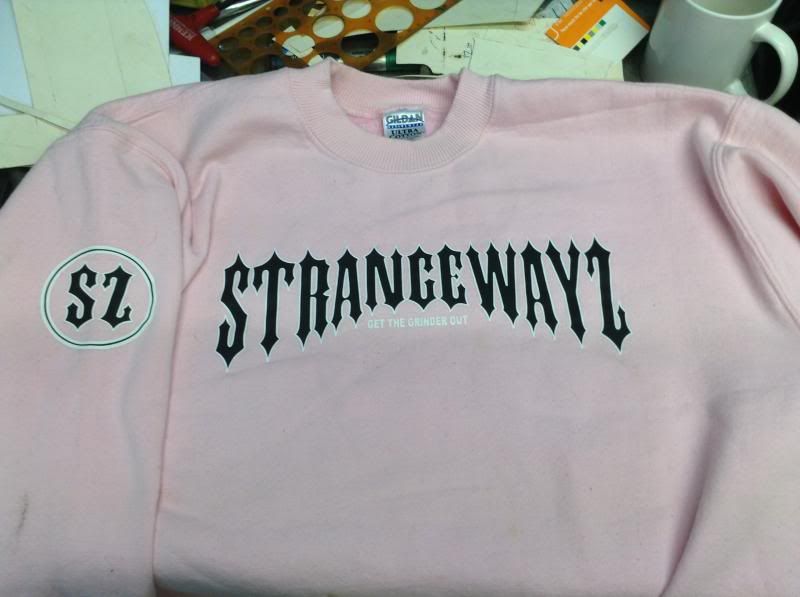 No I'm not going to have a 'kin pink seat !! It's only the first layer which won't be seen but there is a nice twist with this, I've cut the sweatshirt so that the logo's will be visible if you took the seat off, here they are faced up but I will reverse them in the next step.  Picture of kit in use.  Sweatshirt base layer in place, with some chopped mat used at the joints. 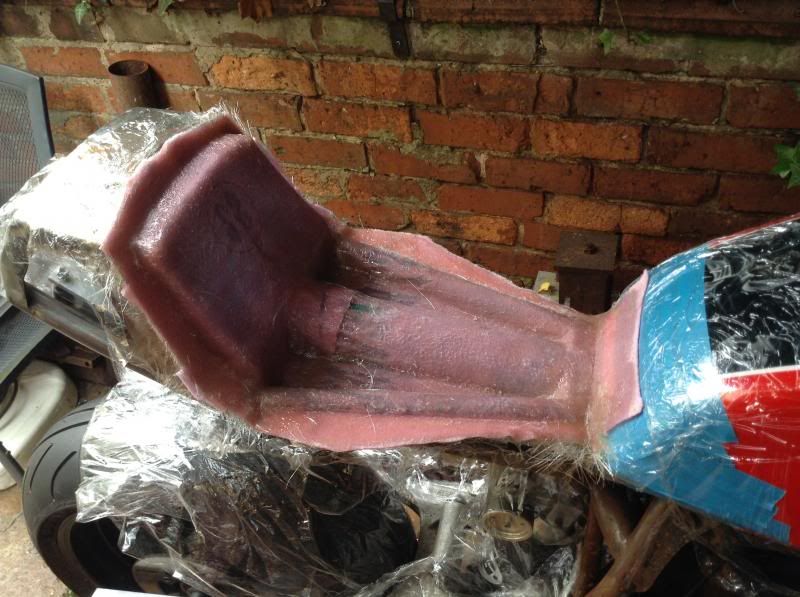 Woven rovings up next. 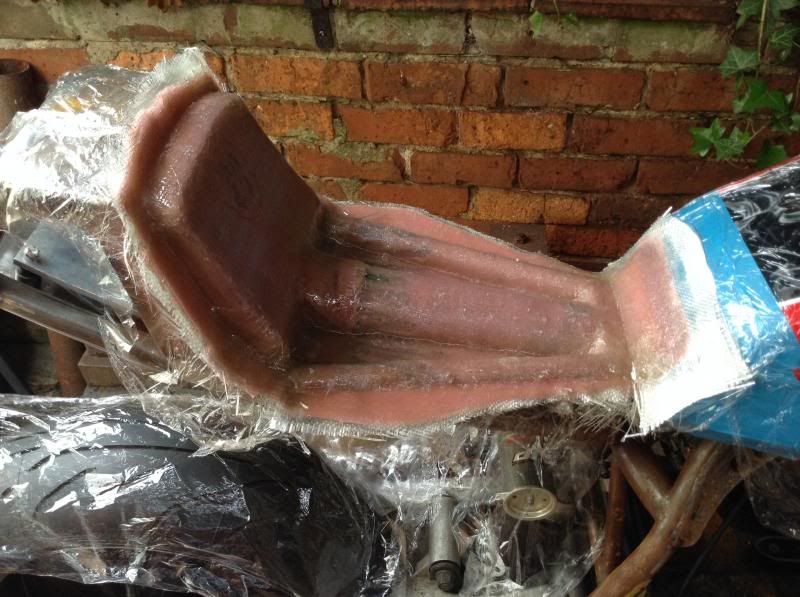 Seat clamps going in. 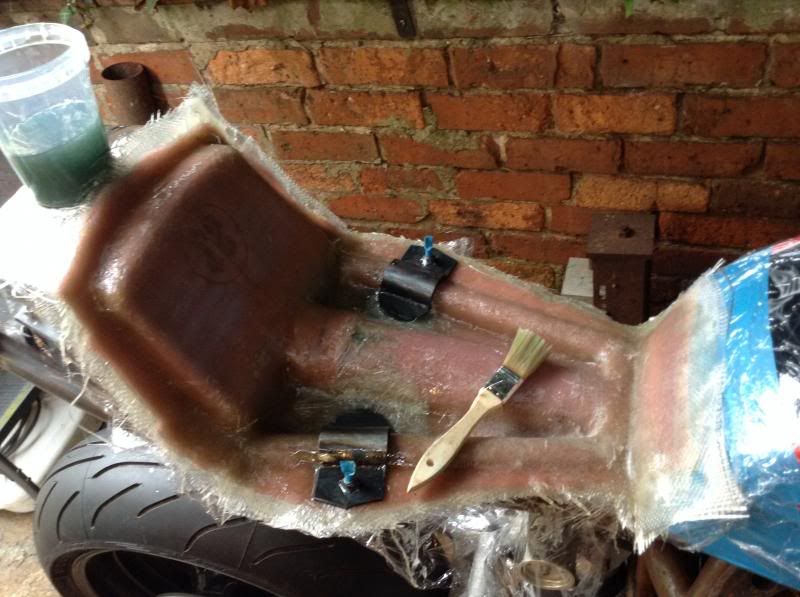 At this point many hours had passed so I peeled off the tape from the back panel to have a quick look & what do you know, it worked !! 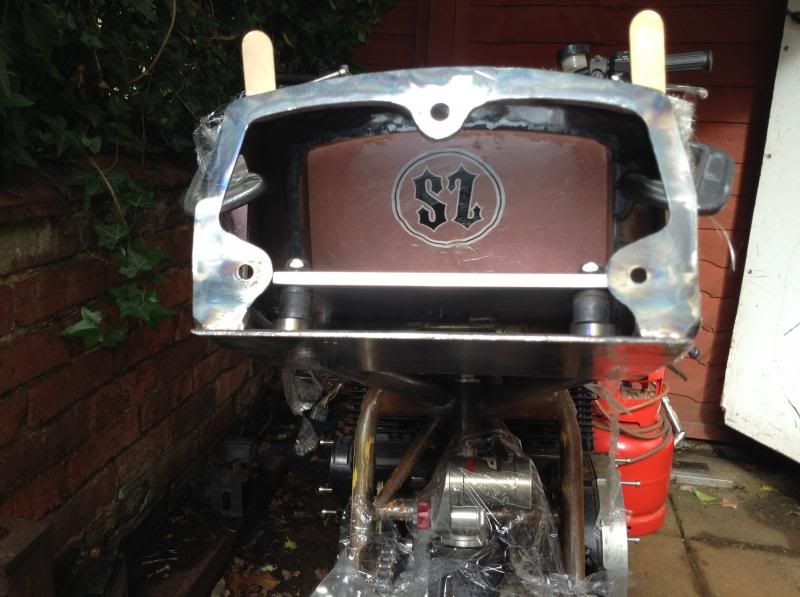 Finished with a layer of chopped mat & clamped down in place to cure, didn't want it to curl the edges up. 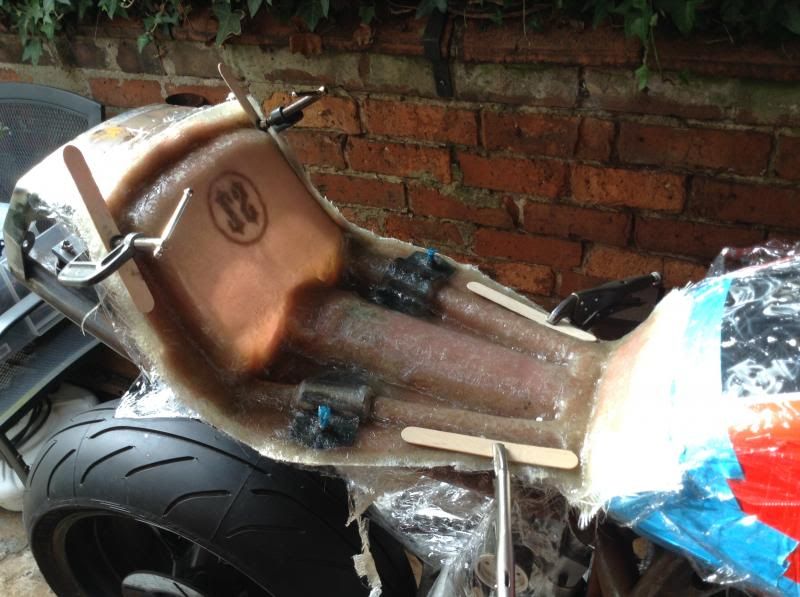 I think that's a cool seat base using her old top, this isn't a tribute or themed bike but I just like that idea & oh so subtle. |
|
|
|
Post by captain chaos on May 1, 2014 18:31:41 GMT
Nice one Alan. I bet she's smiling up there.
|
|
|
|
Post by pedda on May 1, 2014 18:59:36 GMT
Got home & ordered up 520 sprockets, going slimmed down, will be using a high spec chain & guess I'll see for myself how much it stretches in use. 520 high tensile chain will do nicely. What's good enough for 1000RR Beemers will also be good enough for our gorillas. Got a 520 pitch chain on my 1230 EFE engined Kat and it is spot on. |
|
|
|
Post by busaash on May 1, 2014 19:13:14 GMT
Nice touch on the seat base alan |
|